akent
Moderator    FIRST 30 MEMBER
I love the 500!
Posts: 2,826
|
Post by akent on Mar 15, 2009 14:46:29 GMT -6
Well, I just finished my third Exi yesterday! I had to temporarily 'borrow' a couple of things from the 450SE that haven't yet showed up. Namely the gyro and motor. The SE will be grounded anyway while it waits for new cyclic servos and a new motor with an 11 tooth pinion. The Towerpro SG90's are getting replaced with better servos. I do apologize for not taking pics during the build, but I have a few closeups that show how things were mounted. It's a very nice aluminum box that it comes with! I have since bought two more of these boxes separately, one for each Exi! My overall thoughts on this heli is that it is an amazing deal. There is virtually no plastic on the whole heli. The frame, battery holder and both fins are carbon fiber. The head is all CNC metal, the tail is CNC as well with the servo slider being the only plastic part. The canopy is a very nice quality fiberglass. The blades are very nice fiberglass with a carbon fiber leading and trailing edge. These are very stiff. The covering is fiberglass with a gel coat finish. The bad parts: 1. This heli came with a bent front belt pulley shaft. It was really bent! I replaced it with an align part that fit perfectly. 2. It came with all philips screws. I hate philips. I bought a screw set for a Trex 450 and replaced them all. Here's the parts list for the build: 1. AR7000 receiver. (Normally $100) (came with the DX7 radio bought new from Ebay) 2. Exceed Alpha 400 3500 kv motor with 13 tooth pinion. ($15 on sale) www.xheli.com/al4003oubrmo.html3. Hobbywing Platinum 40 amp ESC with 3 amp switching BEC. ($57) www.helidirect.com/hobbywing-platinum-p-10274.html?cPath=1_45_4344. 3 x HS65HB servos for the cyclic. ($25 each: $75) www.helidirect.com/hs65hb-micro-servo-universal-p-2930.html?cPath=1_359_362_4955. HB2216MG tail servo. ($20) www.hobbycity.com/hobbycity/store/uh_viewItem.asp?idProduct=6607&Product_Name=Digital_high_torque_bearing_servo_15.7g/2.2kg/.09sec6. XM Hobbies G401B HH gyro. ($36) www.cnchelicopter.com/servlet/the-1403/xmhobbies-digital-gyro-G401B/Detail7. Zippy 2200ma 30C 3p. ($23) www.hobbycity.com/hobbycity/store/uh_viewItem.asp?idProduct=7635&Product_Name=ZIPPY_Flightmax_2200mAh_3S1P_30C_8. The Exi T-450 CF helicopter kit. ($189 - of course on sale now for $150! That's a bargain!) www.xheli.com/exitsecaedar.htmlGrand total: $515.00 Note that I was not after cheap parts with this one. I wanted to build up a nice helicopter. All in all, this is an awesome and smooth heli. It is also a Ferrari. It is VERY FAST on the controls. I was able to tame it with 20% expo on the transmitter for elevator and aileron. Enjoy! Kent |
|
akent
Moderator    FIRST 30 MEMBER
I love the 500!
Posts: 2,826
|
Post by akent on Mar 15, 2009 14:56:31 GMT -6
Here's the box it came in: 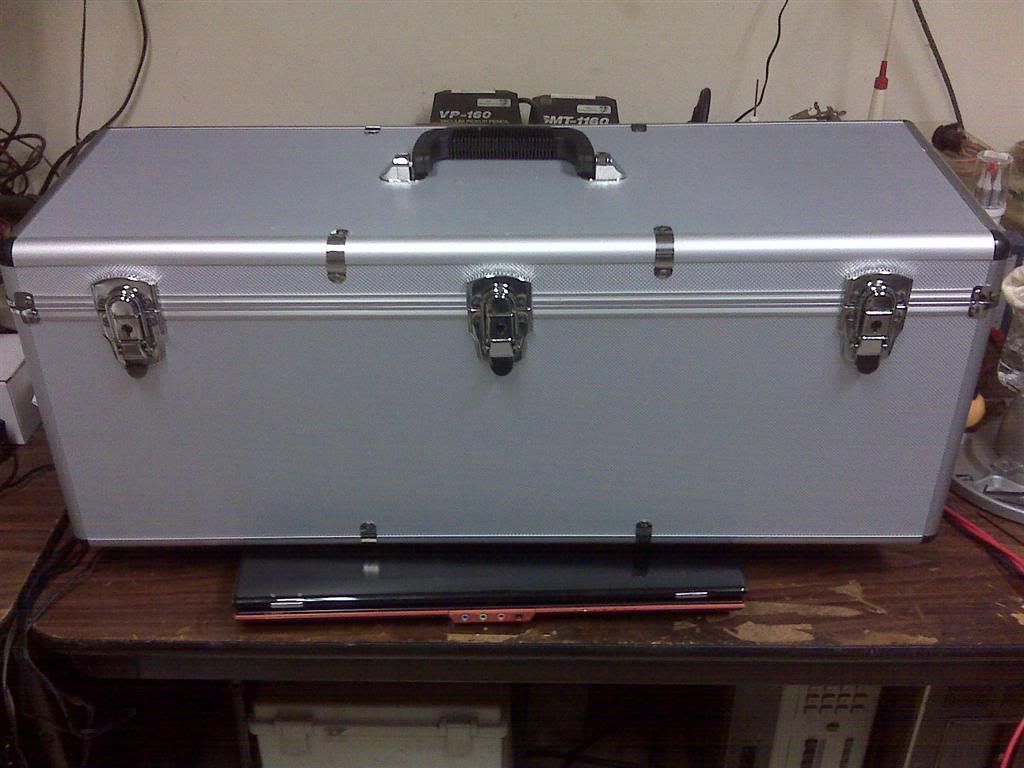 The inside: 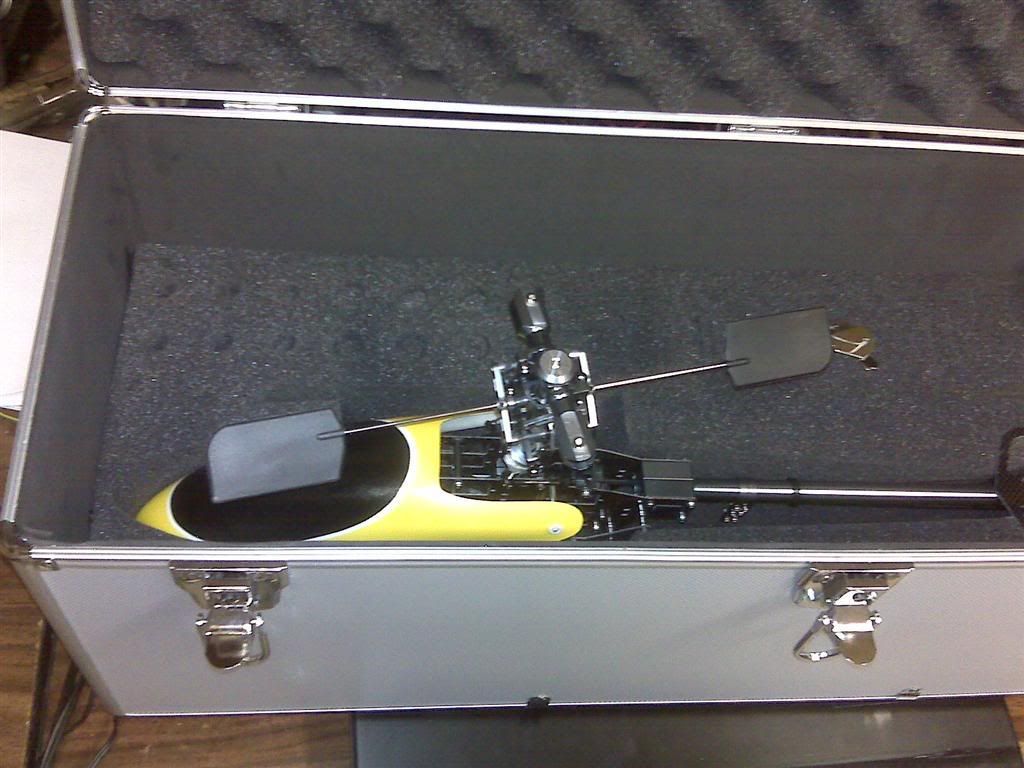 Another: 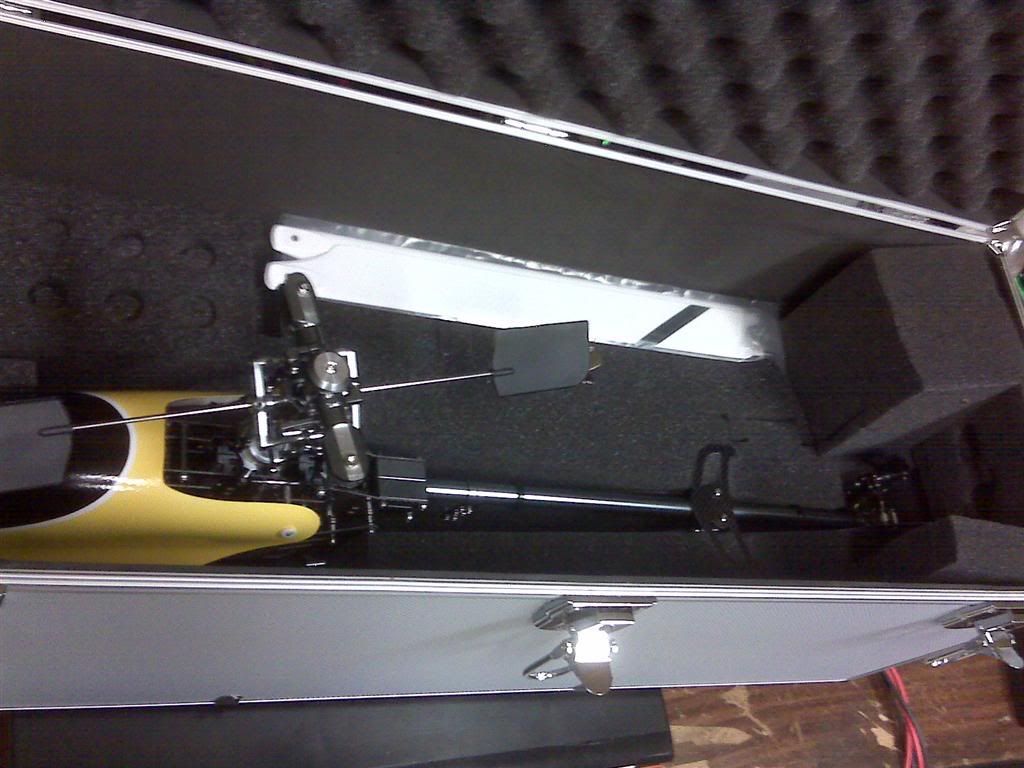 Here's the heli: 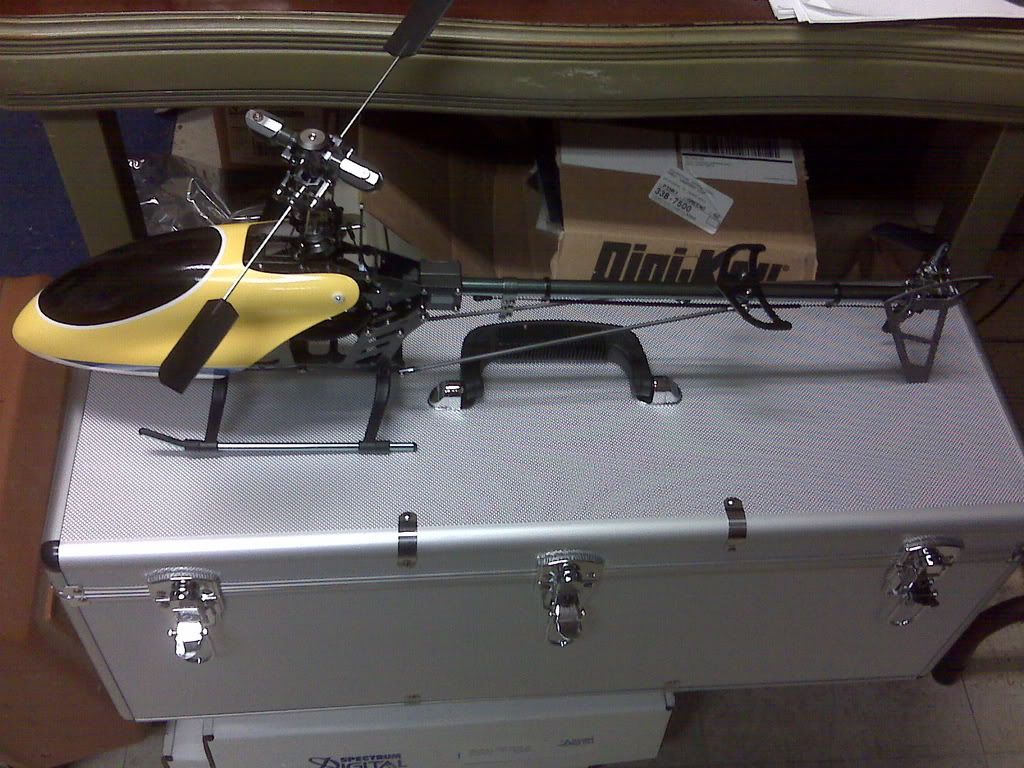 Another: 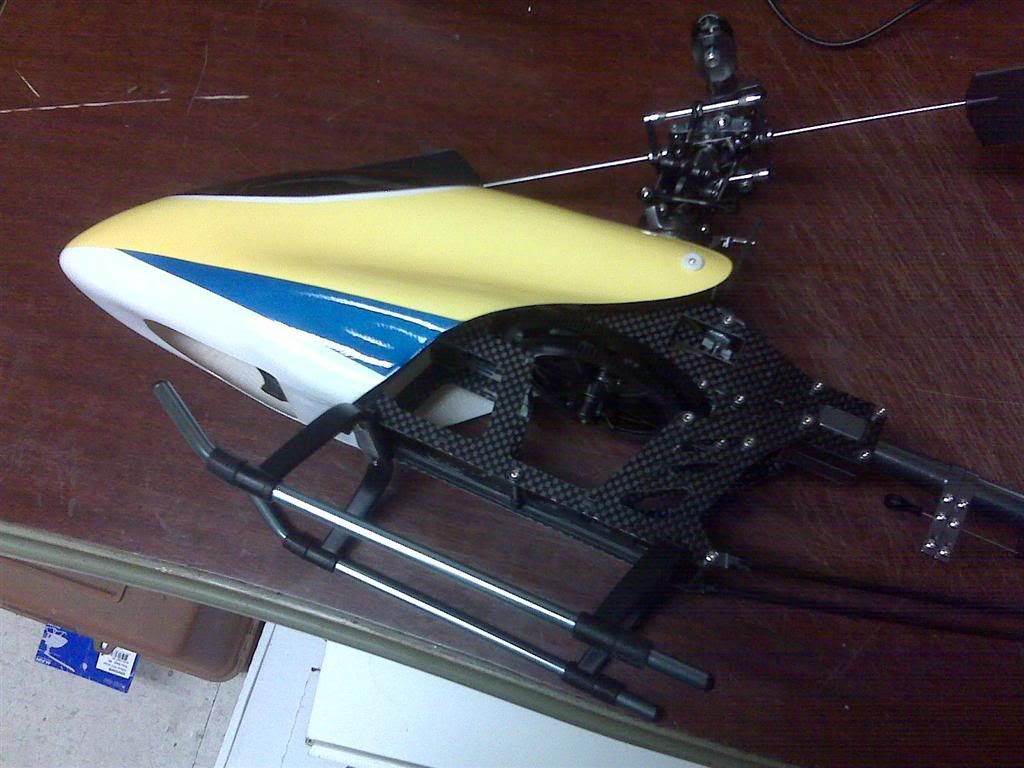 |
|
akent
Moderator    FIRST 30 MEMBER
I love the 500!
Posts: 2,826
|
Post by akent on Mar 15, 2009 15:04:37 GMT -6
Poof! Skip forward and it's all done! The motor was the first thing installed. It was tight enough on the gear to have slop enough to easily pass a piece of copy paper through the teeth without tearing. You can feel this slop by rocking the gear. It should not be too loose, though. I can actually adjust it better by feel than the paper technique, but I did the paper just in case. Be sure to turn the gear and check for a little bit of slop all the way around, in case the gear is not perfectly round. If I were to guess, I would say the gear moves about 0.020 inches. ==== Here's some pictures of the cyclic servos from various angles. The arms for the HS65 servos are very long. I just need to use the second hole to get everything lined up. Note that all of these servos mount from the inside of the heli. It was very easy to remove the head (single screw on the bottom gear), the upper bearing holder, the anti-rotation bracket and a couple of strengthening bars. The servos then just slide in when you can separate the chassis halves slightly, and this gives you plenty of room to work in. There were no servo nuts in the kit, so I just used some 2-56 screws and nuts with loctite. Worked just fine. Nylon locking nuts would have been better, but I couldn't find any in that size. Elevator servo: 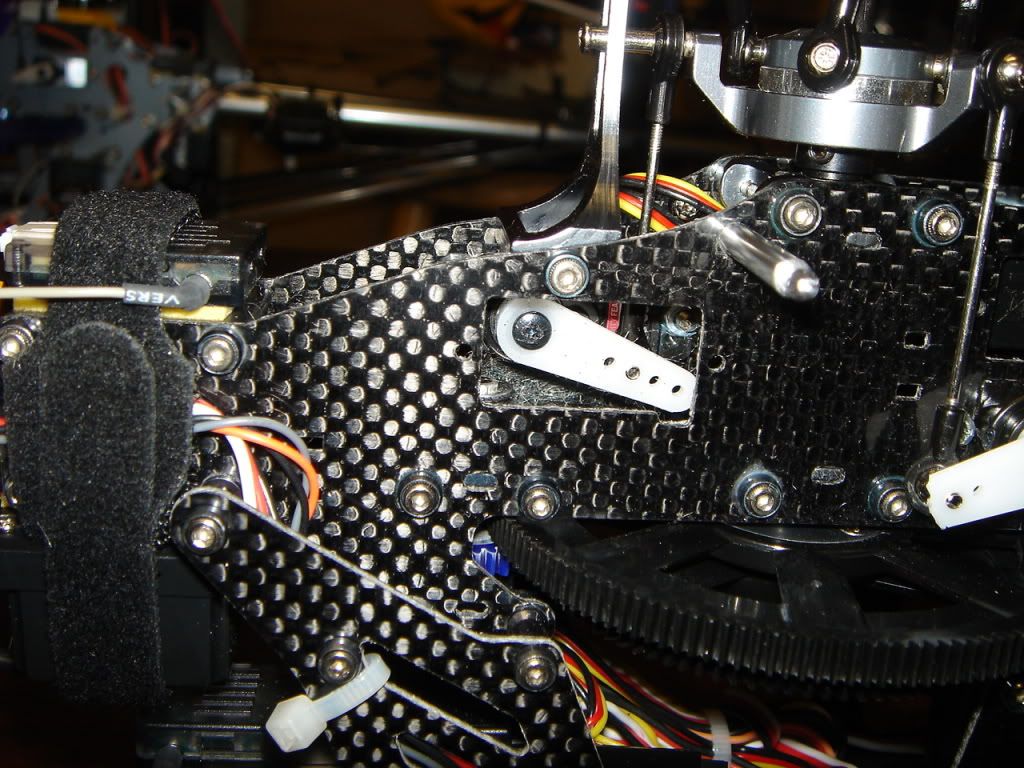 Aileron servo: 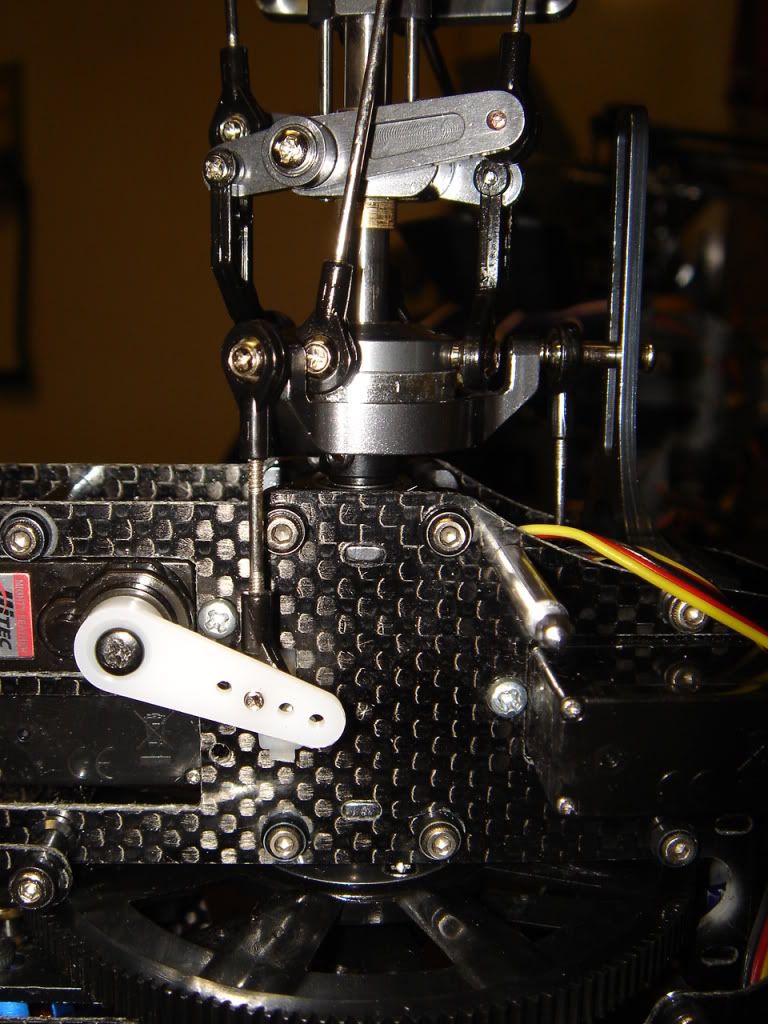 And the pitch servo: 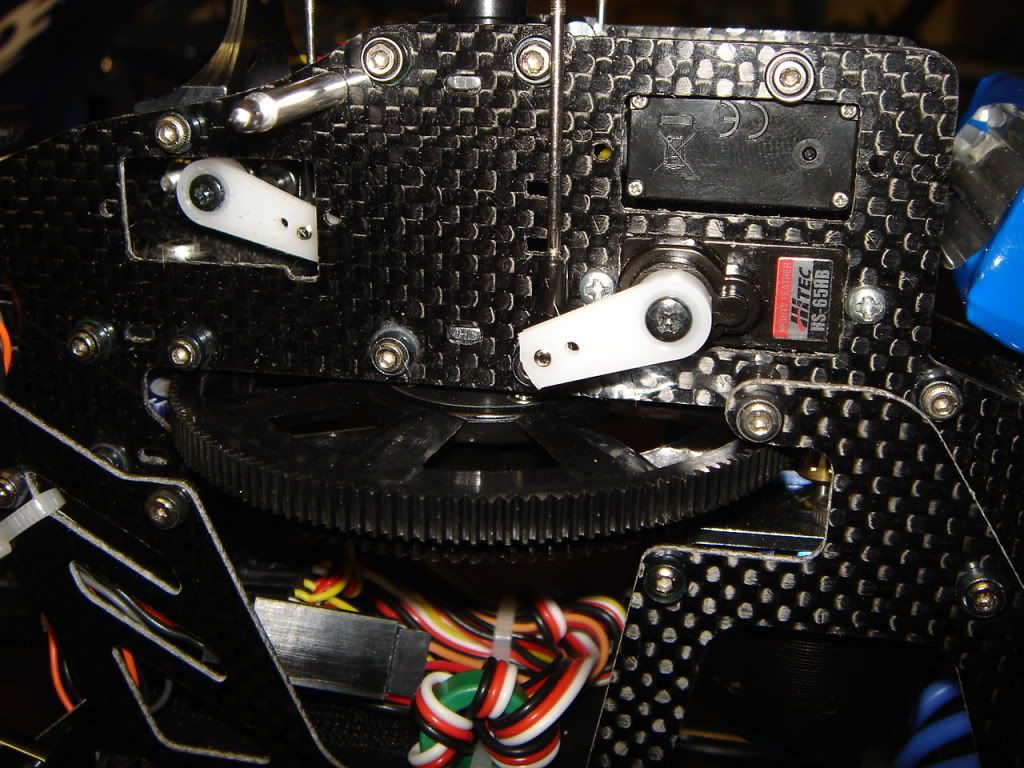 NOTE: The pitch servo arm was so long that at full down pitch and full right and forward cyclic, the arm would go into the gear. BE CAREFUL with yours here! Another shot: 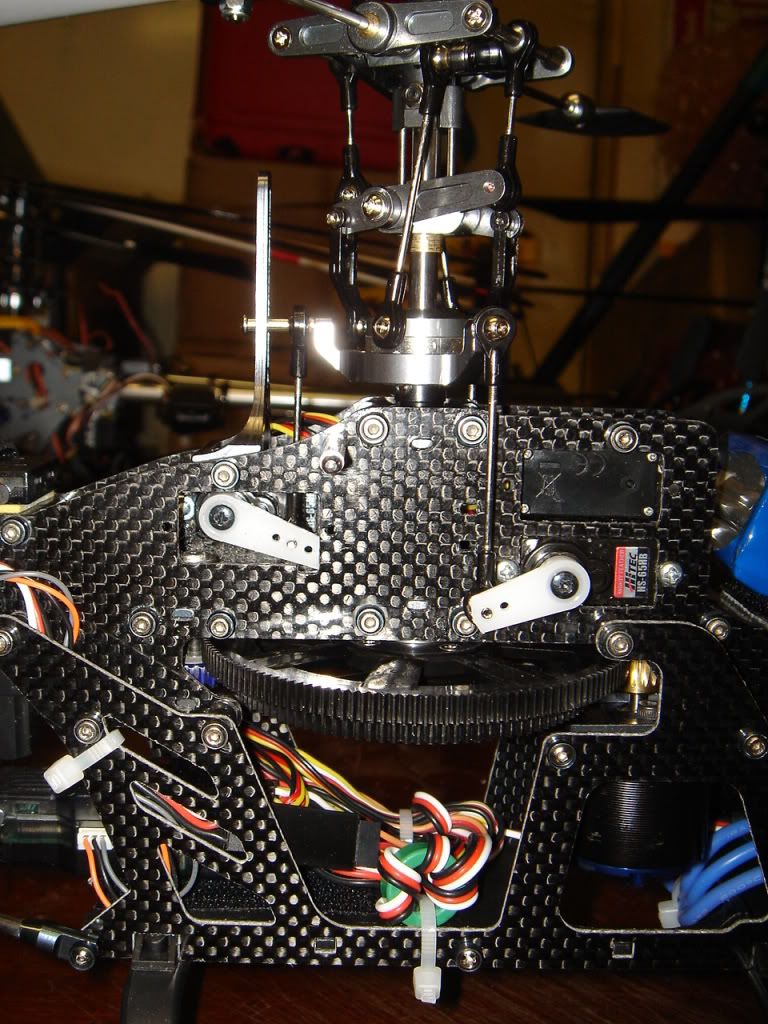 And another: 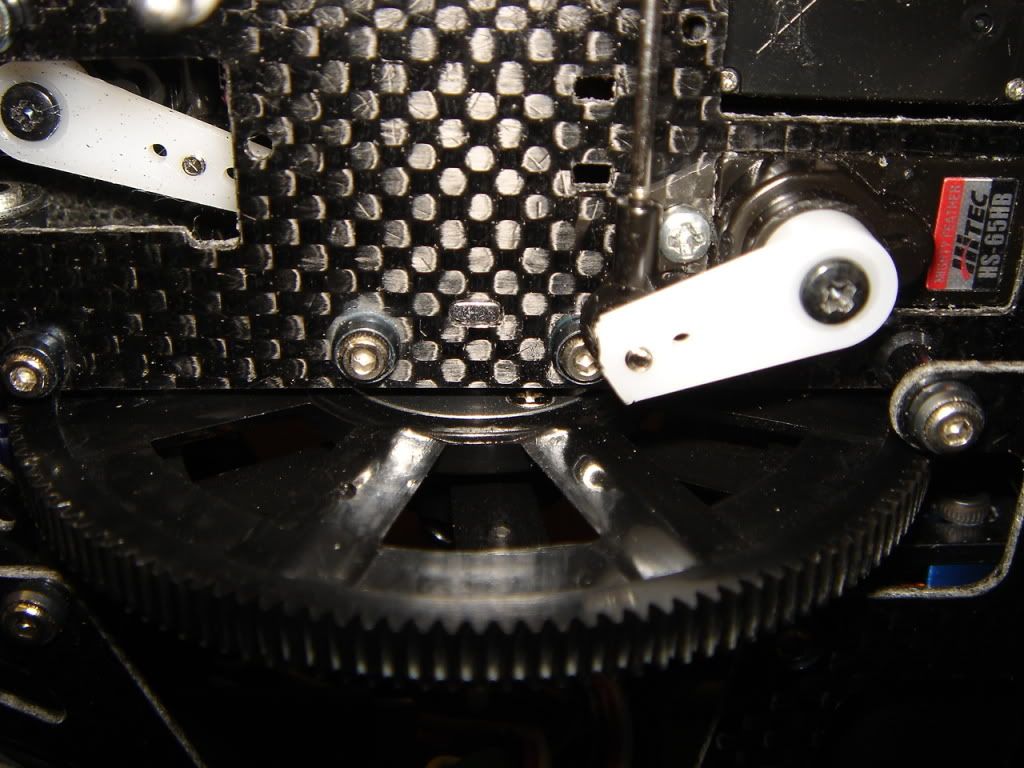 |
|
akent
Moderator    FIRST 30 MEMBER
I love the 500!
Posts: 2,826
|
Post by akent on Mar 15, 2009 15:14:18 GMT -6
On to the head setup, now that all of the cyclic servos are installed. There is a new trick that I read about that is easier than Finless Bob's head setup. It works especially well with these Exi's. With the transmitter throttle/pitch stick at mid-stick, use your sub-trim to get each servo arm perfectly parallel. Then, here's the trick. Level the swashplate at 10mm above the bearing block. I started with the pitch link and made the swash 10mm high (0.393 inch). Then I made the other links the right length to make the entire swash level at 10mm high. With this height, there is no problem with the head hitting too high or bottoming out. This is very cool. The rest of the head linkages on at least mine were perfectly level then, too. I didn't need to touch any other link. Note that the swash doesn't need to be 'exactly' 10mm. But it should be close. I used calipers for this task. The same was also true when I built the Exi 450SE. Here's a shot of the head, but this shot is not when everything is level!: 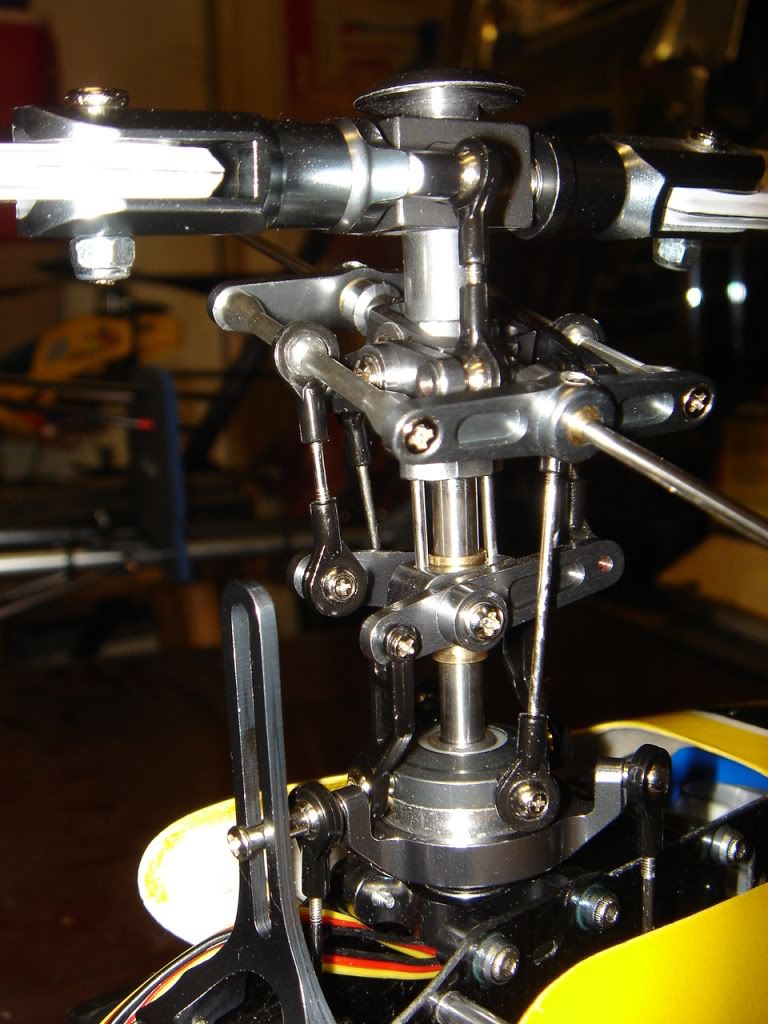 |
|
akent
Moderator    FIRST 30 MEMBER
I love the 500!
Posts: 2,826
|
Post by akent on Mar 15, 2009 15:28:57 GMT -6
Now to adjust the tail belt. The belt should be just tight enough to where with light pressure with a screwdriver or similar on the outside of the belt, about two diameters of the pulley away from the pulley, that you can move the belt 3/4 of the way across to the other part of the belt. This is pushing from the outside of the belt. You should need considerable pressure to make it touch the other side. In the picture of the belt, there appears to be a ton of dust in there! It really only shows up in the picture for some reason. There is some light belt dust in there, but not as much as the pic makes it appear to be! I don't know why. Here's a pic of the belt: 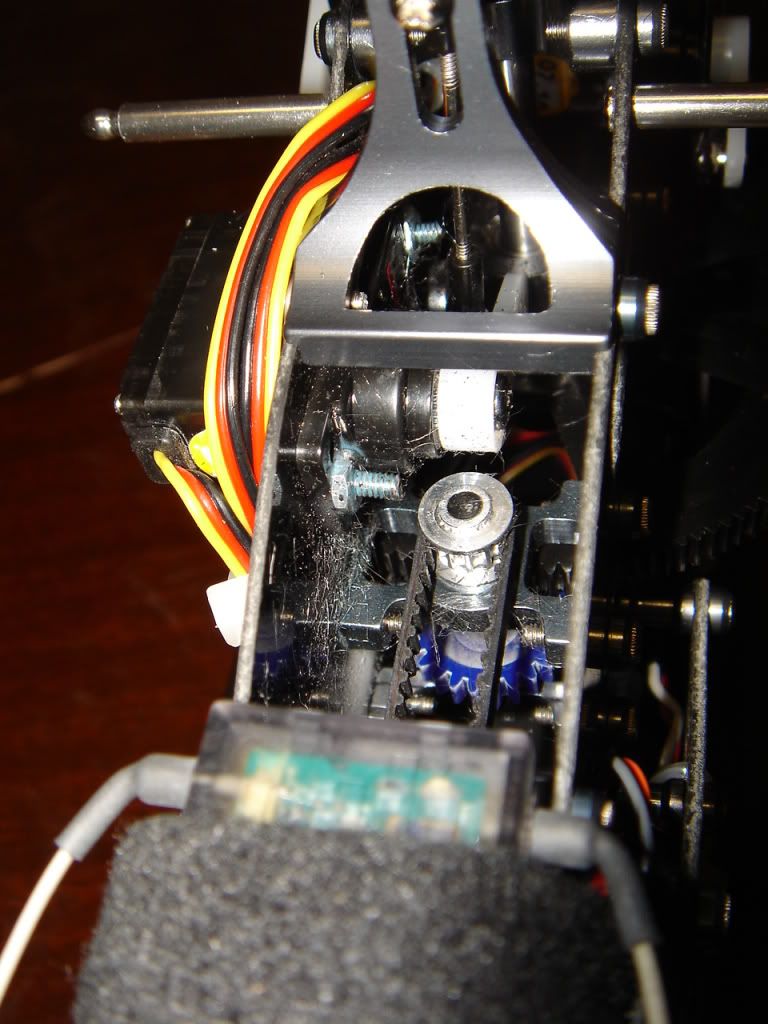 Here's a clip from the Trex manual: 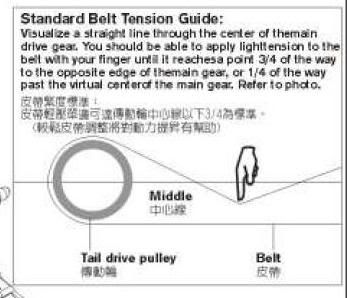 |
|
akent
Moderator    FIRST 30 MEMBER
I love the 500!
Posts: 2,826
|
Post by akent on Mar 15, 2009 15:31:28 GMT -6
I mounted the ESC on the lower shelf with double sided tape and a larger nylon tie. The battery sits is on the top shelf held on with velcro and a velcro strap. The strap was included in the kit. Nice touch! 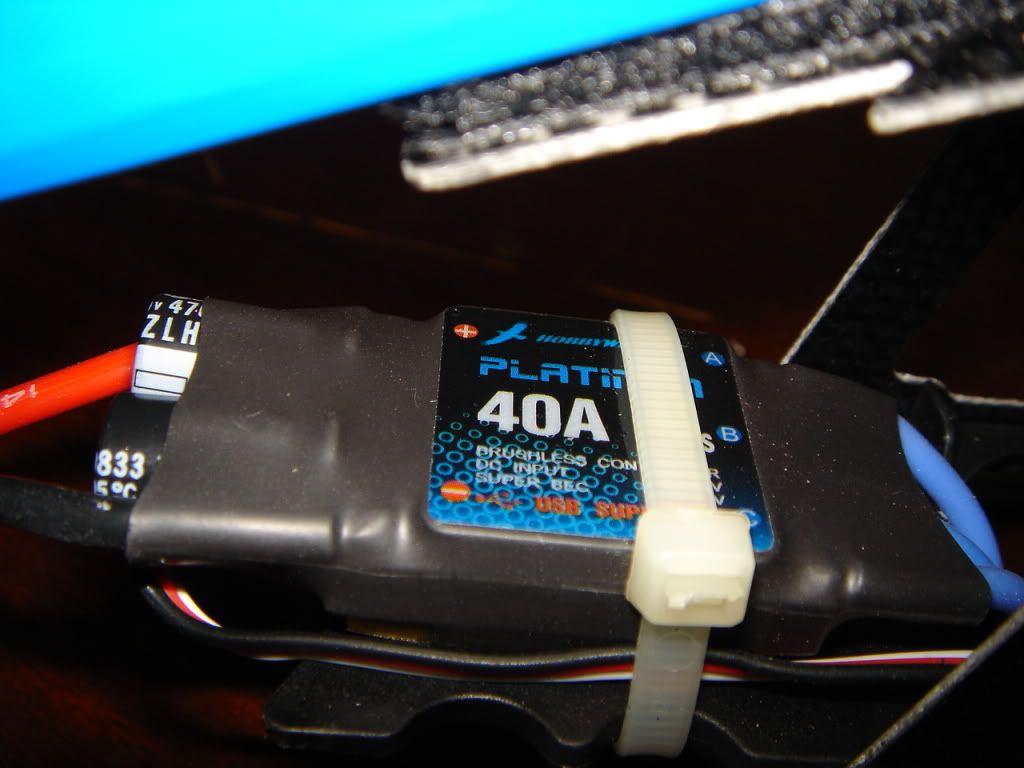 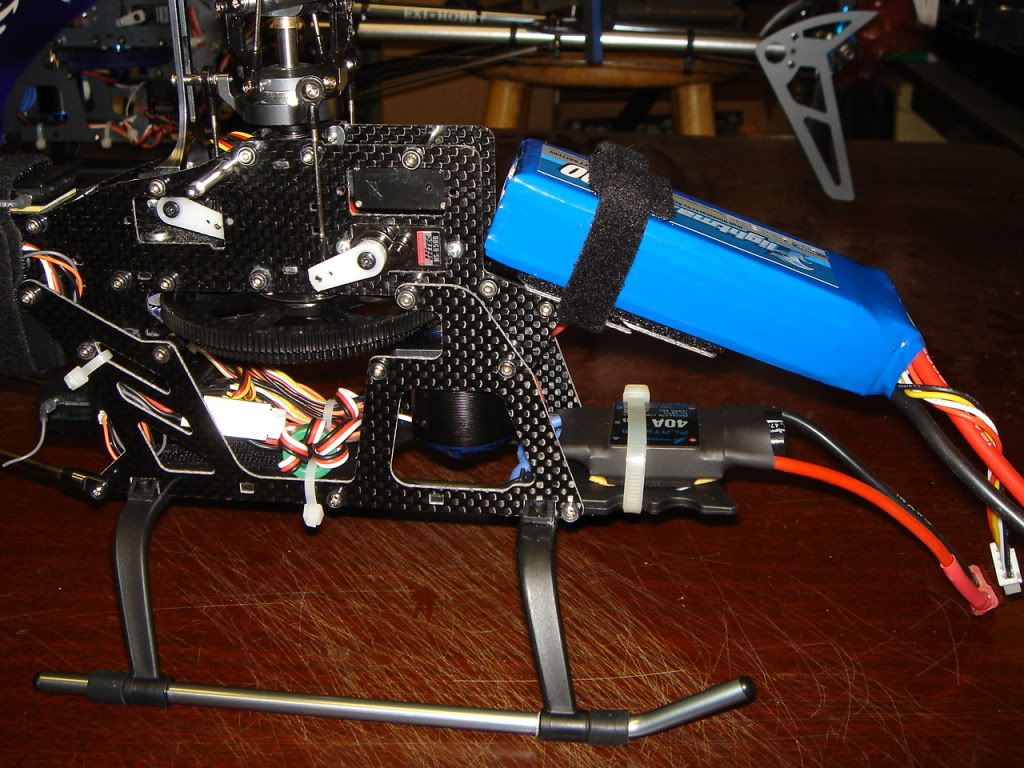 |
|
akent
Moderator    FIRST 30 MEMBER
I love the 500!
Posts: 2,826
|
Post by akent on Mar 15, 2009 15:41:40 GMT -6
I mounted the receiver on the lower rear tray and the remote receiver on the top of the boom mount. I used velcro for the main receiver, and double sided tape and a velcro strap for the remote receiver and the gyro. 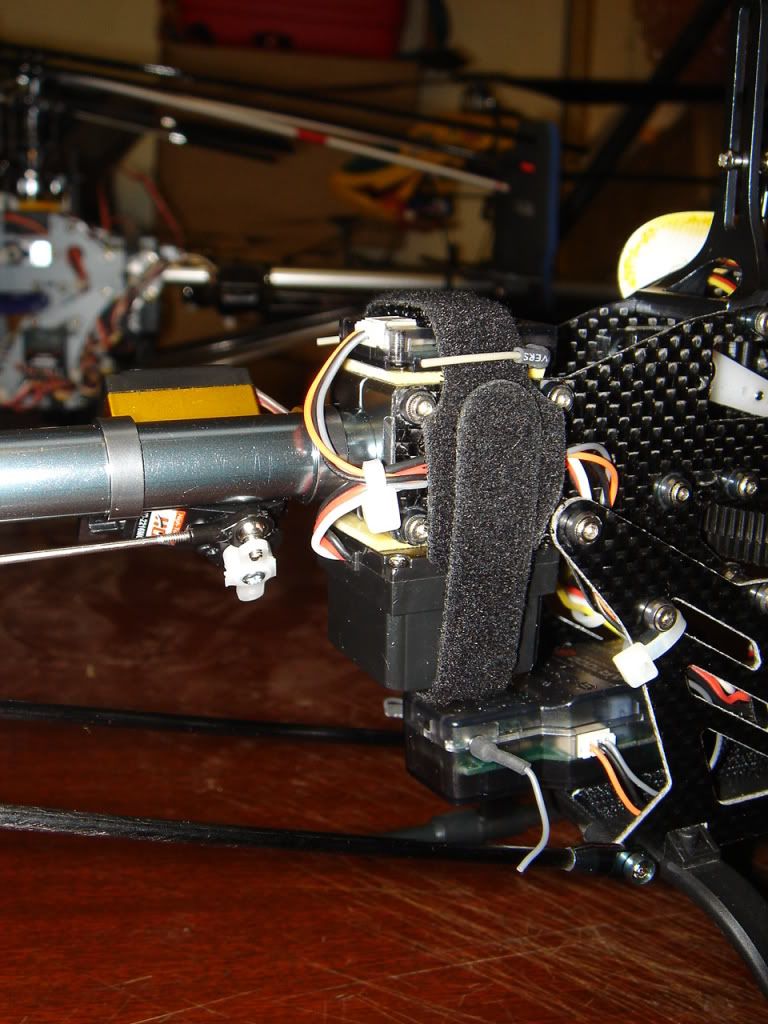 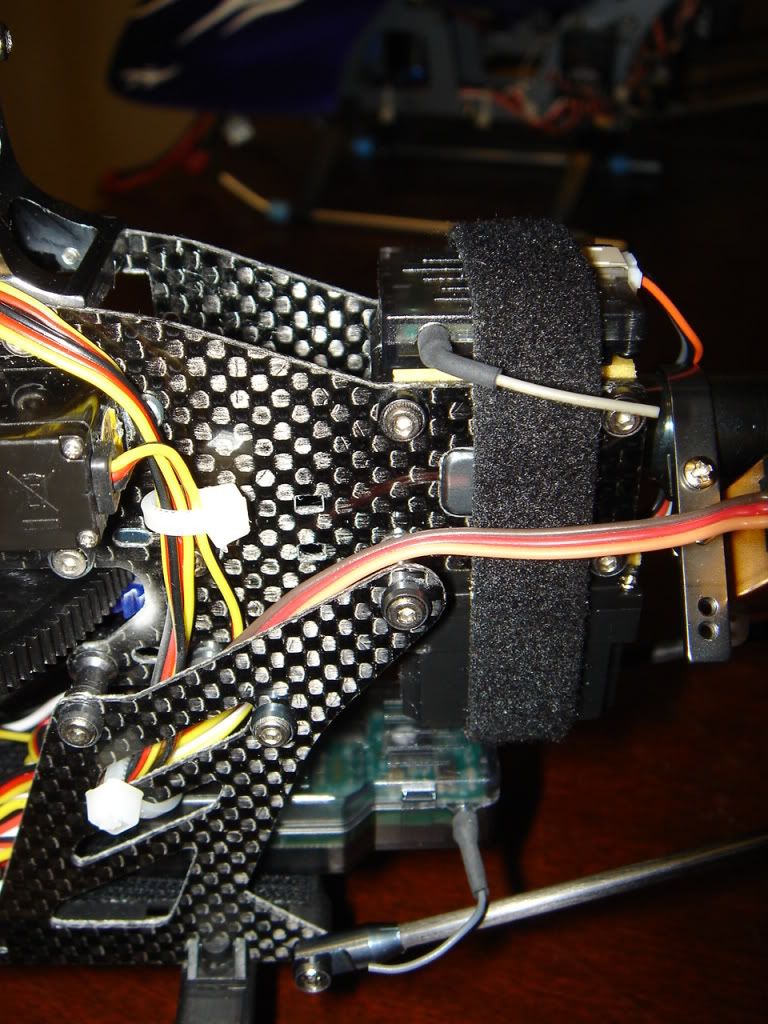 |
|
akent
Moderator    FIRST 30 MEMBER
I love the 500!
Posts: 2,826
|
Post by akent on Mar 15, 2009 15:51:54 GMT -6
The tail servo was next. The servo mount was really meant for a servo with four mounting screws. The HB2216 only has one on each side. There was just enough room to mount it on the upper servo mounting hole. 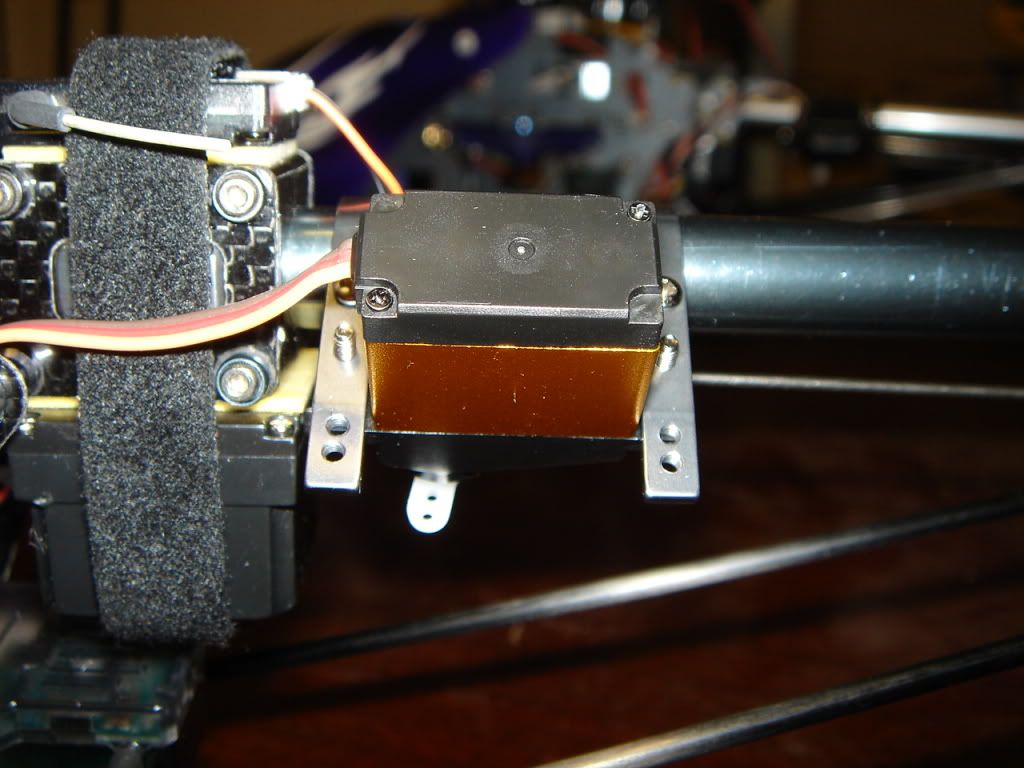 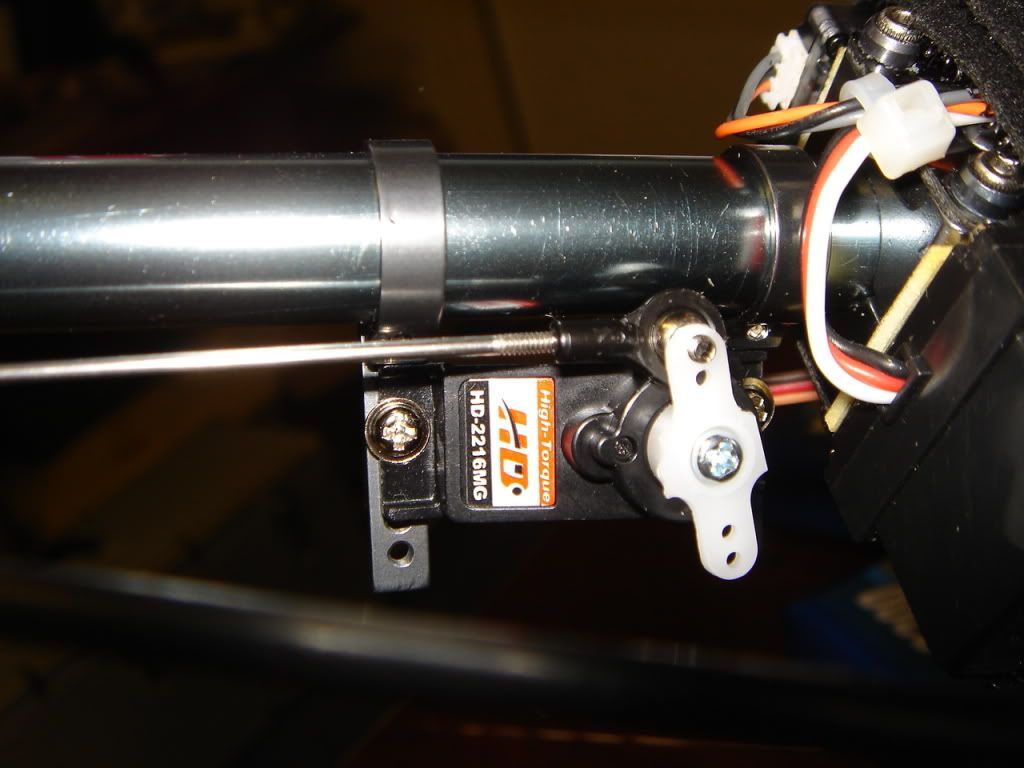 |
|
akent
Moderator    FIRST 30 MEMBER
I love the 500!
Posts: 2,826
|
Post by akent on Mar 15, 2009 15:54:45 GMT -6
Now onto gyro setup. This is for the XM G401B gyro and is very similar to the Futaba 401. With the servo arm perfectly perpendicular to the boom (use subtrim on the transmitter, slide the servo forwards and backwards on the servo mounts to get the blades perfectly even and centered. It helps to fold the blades towards each other. When you have the blades centered and the servo control rod straight, tighten the servo holders. I ended up with the rudder reversed in the transmitter, and normal on the gyro. The digital switch is turned to digital with the 'delay' set to zero. The travel limit is slightly higher than 100 on the gyro. The travel limit is a pot on the gyro that you turn as you go to the extremes on the transmitter. Turn it up and down until it travels the full distance, but does not bind. I left the transmitter travel set to 100%. I also have the gyro bound to the throttle hold switch on the DX7. That way, I can carry the heli around without the gyro pegging the servo all the time. In throttle hold mode, the gyro is in rate mode with a transmitter setting of 35%. In throttle hold off (normal flight) mode, the gyro is set to head hold (above 50%) and is currently set to 68%. With a fresh battery there is just a hint of wag at first, so I'll probably bump this down a percent or two. 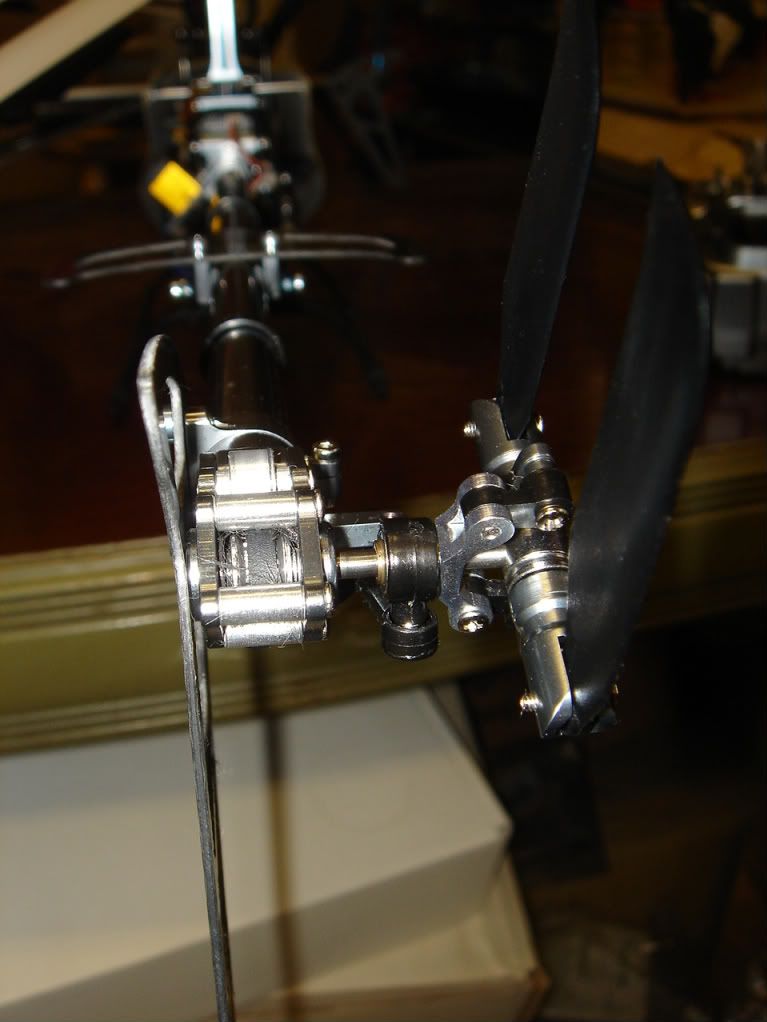 |
|
akent
Moderator    FIRST 30 MEMBER
I love the 500!
Posts: 2,826
|
Post by akent on Mar 15, 2009 16:07:08 GMT -6
Finally, my transmitter setup:
I have normal mode set to:
Throttle: 0-50-70-85-100
Pitch: 40-45-50-75-100
Idle up 1:
Throttle: 100-80-70-80-100
Pitch: 0-25-50-75-100
Idle up 2:
Same as idle up 1.
The headspeed is around 3200 RPM. Pretty fast!
The pitch angles on the head are 0 at mid stick and +/- 10 degrees at the extremes.
Aileron and elevator are each set to +/- 6 degrees.
These are all set by the swash mix menu.
I think that's about it!!
Here's a video of the second half of the second battery, after I had the blades tracking and the gyro tweaked better.
|
|
Doozer
Paint Staff   FIRST 30 MEMBER
Working on GP Ultimate Biplane
Posts: 1,508
|
Post by Doozer on Mar 16, 2009 15:00:56 GMT -6
Nice build Kent.... This is the way a build should be presented. Great info. Says your vid is no longer available??
|
|
akent
Moderator    FIRST 30 MEMBER
I love the 500!
Posts: 2,826
|
Post by akent on Mar 16, 2009 15:38:19 GMT -6
Thanks Doozer!
I just played it...It didn't work for you?
Kent
|
|
|
|
Post by Dave on Mar 18, 2009 17:55:39 GMT -6
Very very nice build Kent......lookout Robby.
Vid worked good for me.
|
|
Doozer
Paint Staff   FIRST 30 MEMBER
Working on GP Ultimate Biplane
Posts: 1,508
|
Post by Doozer on Mar 19, 2009 0:14:29 GMT -6
I'm out of the build game for a while .... I've got a radio to buy and spare parts to stock up on. My next heli will be flybarless. The Electric Flight Expo convinced me, but the most important thing on the to do list is a JR X9303. Hitech has a new 9 channel coming out that pretty much blows the doors off anything I've seen... but I'm derailing this thread.
Kent,
I'm not sure why 10 mm at mid stick, or did I miss something?
|
|
fergie
First 30 Member   FIRST 30 MEMBER
Posts: 1,094
|
Post by fergie on Mar 19, 2009 8:14:53 GMT -6
real nice heli kent, i sure like those EXI's ;D
|
|