|
|
Post by flyinghigh on Jan 24, 2010 17:56:08 GMT -6
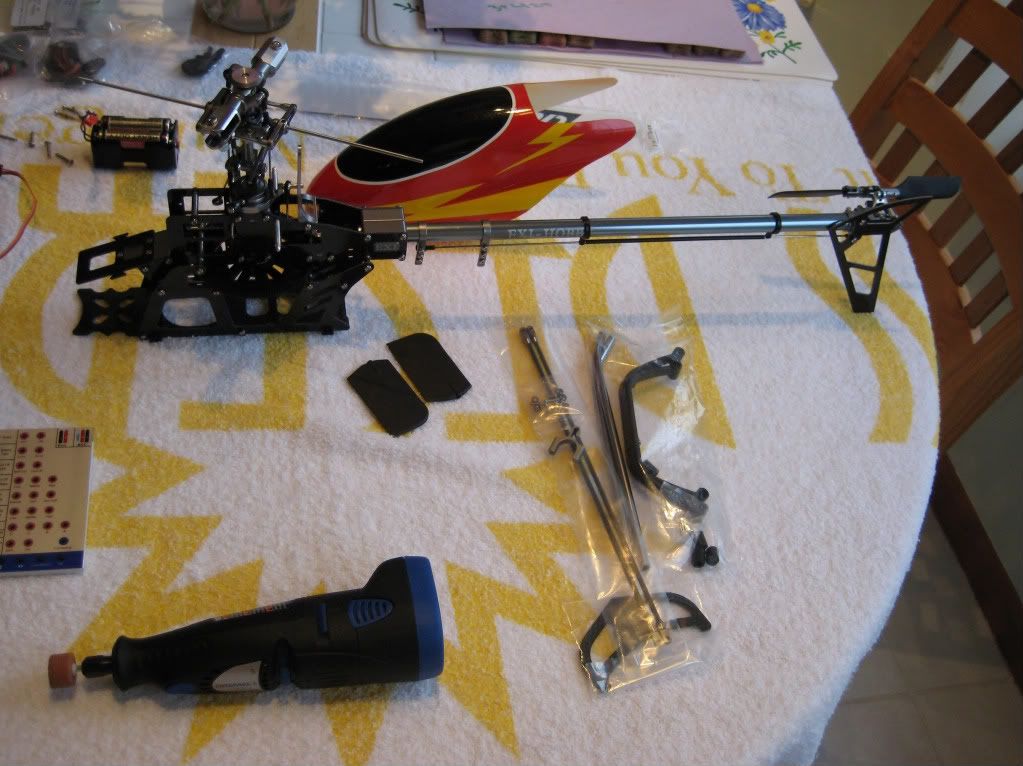
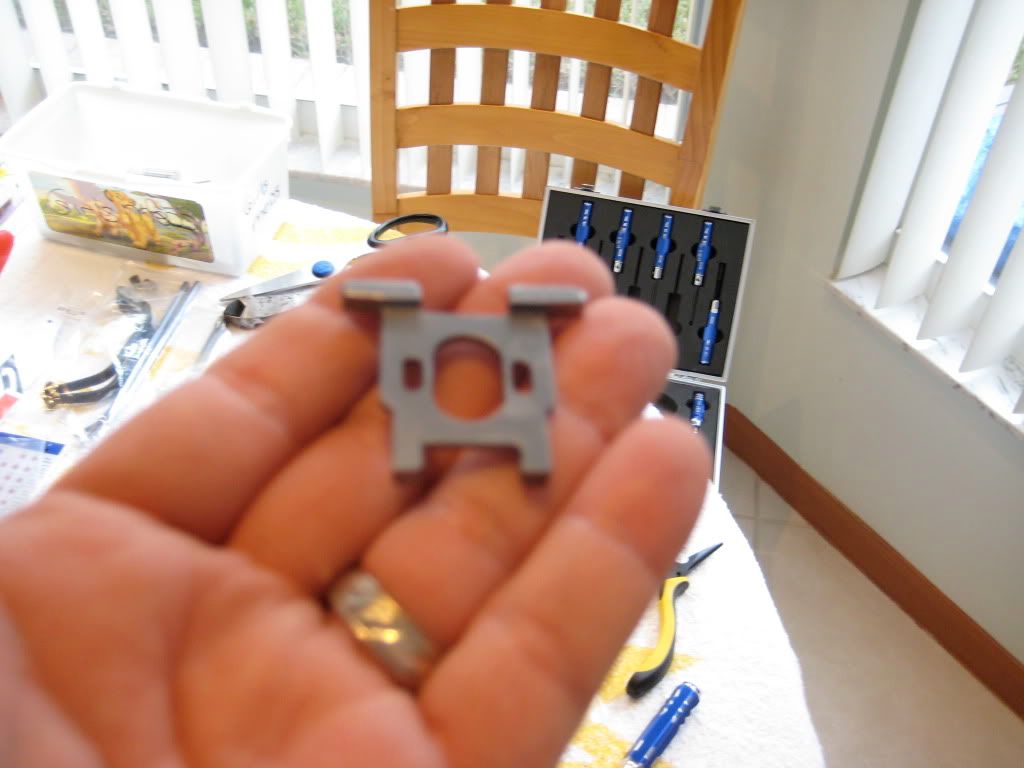
I finally was able to spend a few hours and start my first build. I did not get too far -  Here is what I have - EXI T-450 SE Carbon Edition Helicopter Kit - $77.00 - Xheli D2830 3500rpm/v 438W Outrunner Brushless Motor - $20.00 - Xheli (Black Friday Sale) 40A Brushless Electric Motor Speed Controller ESC [Volcano Series] - $19.00 - Xheli (Black Friday Sale) 9G EXI Digital Metal Gear Servo D213F - $9.00 x 3 = $27 - XHeli HITEC HG-5000 GYRO WITH 5083 DIGITAL SERVO - $139.00 - KaPlanes Blue LiPo 3-Cell 2200mAh 3S1P 11.1v 25C LiPoly Battery - $16.95 - XHeli RX - AR6110e $49.95 - LHS   I started by trying to install the motor, only to find out I have no screws for mounting it.  So I moved to the servos, the D213F's have a gusset on the tab that needs to be removed if you want to install them inside the frame. With a dremel it worked out really nice. I tried to just loosen some screw on the frame, but that did not really give me any room to get them in, I ended up having loosen every screw on the frame and remove part of it to install them. Elevator servo was fairly easy, the pitch servo (bottom front), I just could not get the nut on the inside screw. Needle nose, tweezer, nothing worked for me. Going to pick up a pair of hemostats, its the only way I can hold those small fastening nuts in that tight area. I guess I could take the frame completely apart but didn't want to do that. Thats it, Im stuck now till I can get that nut on. And I need screws to mount the motor. This is what it looks like now -  Now I see why I bought an RX ready 450 first  This first build is going to take some time for me, I worked for about 4 hours on replacing the screws in the frame, putting the pinion gear on the motor, and have 1.5 servo mounted inside the frame. Does anyone know what size screws are needed to mount this motor -  And is this the top or bottom of the motor mount? It fell out when I was taking the frame apart and I cant tell which is up -   Kinda disappointed with my first day on the build - my goal was to get the motor and the cyclic servos installed, and the airframe put together (skids, tail belt adjusted etc) I fly better than I build, and that's not saying much....lol |
|
|
|
Post by nunyabizniss34 on Jan 24, 2010 18:22:22 GMT -6
Looks good so far FH. I also built an EXI and the servos can be a b!tch to mount. I ended up putting some CA glue on the nut and glued it to the frame over the hole so that I could get the mounting bolt started, it doesn't hold up against force but it will allow you to mount the servo without having to have 3 hands to do it ;D
Colin
|
|
|
|
Post by Solitaire on Jan 24, 2010 18:32:19 GMT -6
Yep, good start, FH.
If that motor is like most of the others of that size, there are two sets of mounting holes. One set takes a 2.5mm and the other takes a 3mm bolt. Make sure the bolts aren't too long to interfere with the motor guts.
If the motor mount is identical on both sides, it should fit either way.
|
|
BTCat
First 30 Member   FIRST 30 MEMBER
BT Cowboys Cruiser
Posts: 2,213
|
Post by BTCat on Jan 24, 2010 19:02:14 GMT -6
Hey FH, If you look at your motor mount plate as you have it in the picture, you are looking at the bottom side. The little lip goes down.
You have a good start on it. I can remember going through the motor screw issue and cursing the servos. I enjoyed the build, though and learned my way around the heli a lot better by doing it.
Looks like it will be a nice bird.
|
|
|
|
Post by Solitaire on Jan 24, 2010 19:17:41 GMT -6
Yep, if I'd got off my lazy ass and looked at a spare frame, I'd know that.  If the tab is upwards, it may interfere with the lower gear. |
|
|
|
Post by flyinghigh on Jan 24, 2010 19:36:43 GMT -6
Thanks for all the replies  I was not happy with my progress today. Seems I spent a lot of time "spinning my wheels", but I definitely learned a lot. I nearly have 1/2 the frame off, I think when I tackle next I will just pull it off, mount the servos and put it back together. Sol, the 2.5 mm is what I need, the 3mm holes dont seem to line up on the motor mount, and I did notice that you need to watch the length on those screws. Thanks BT for straightening me out on the motor mount! Thanks everyone.  I should get time thru out the week to work on her, really hoping by end of next weekend I can at least have it all built. |
|
|
|
Post by flyinghigh on Jan 31, 2010 10:25:25 GMT -6
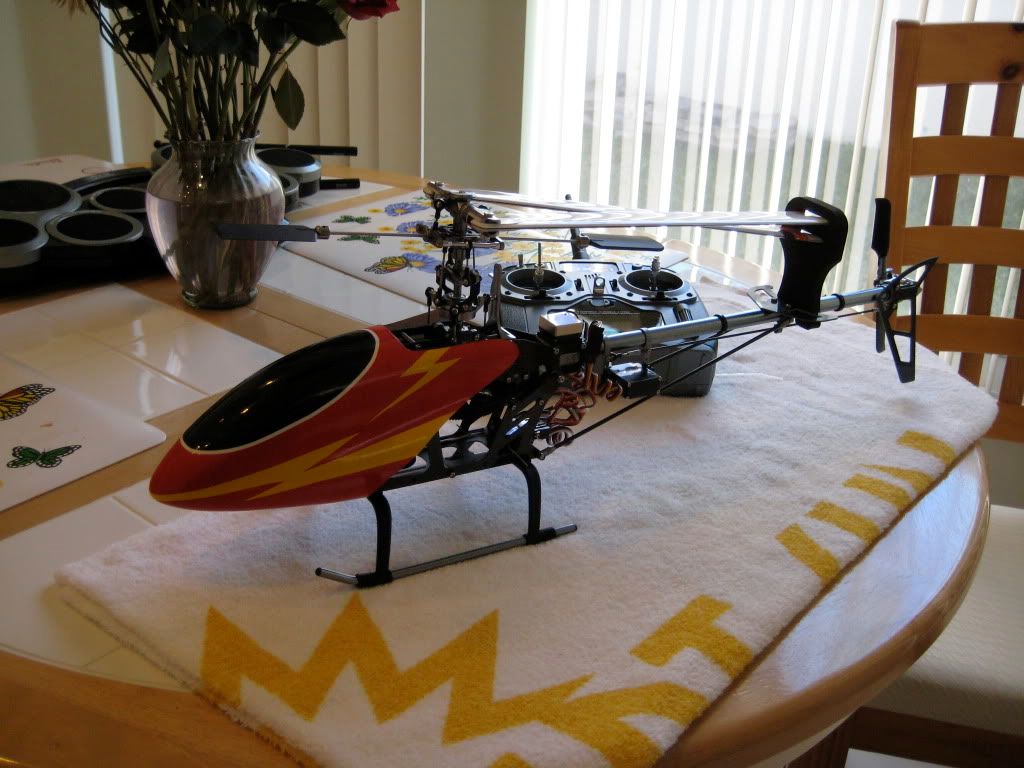
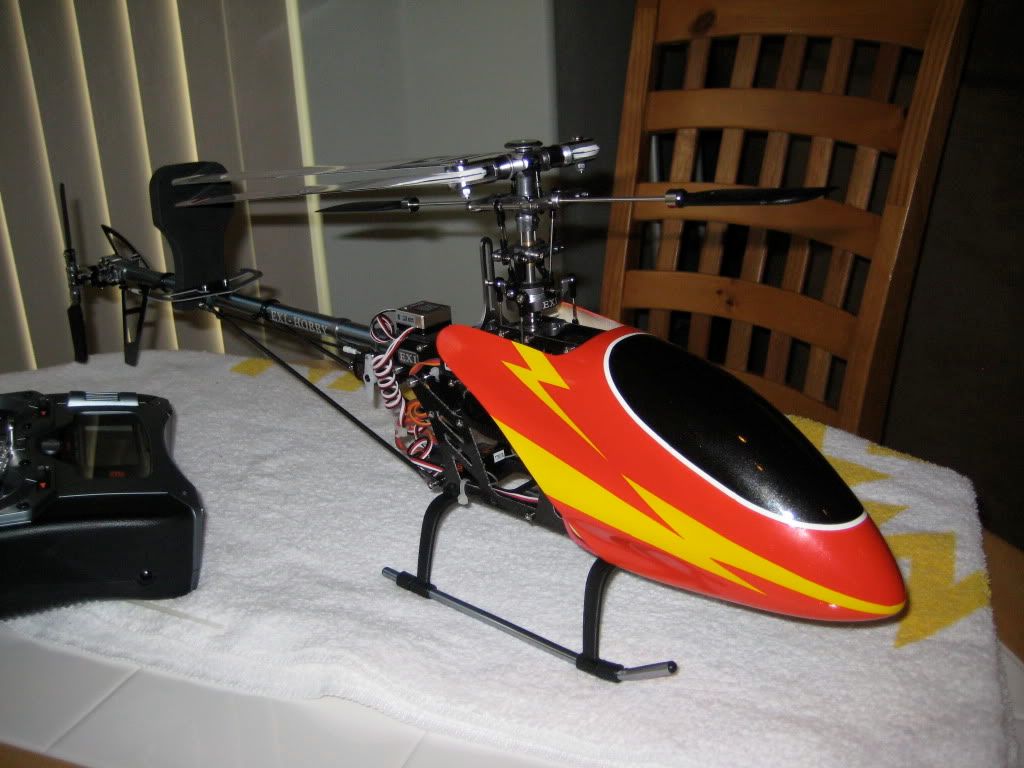
Day 2 - Yesterday afternoon I finally got a few more hours in on the build. I ended up just removing one side of the frame, and then completing the install of the servos. It was much easier, I can't fit my fat fingers inside the frame. I then put the frame back together. Next I installed the motor, I wanted to mount it in such a way the wires come off the motor to the front, but they would bind really hard against part of the frame. So I ended up mounting so the wires come out the back. For now I have them out side the frame coming around to the front, so I have easy access to them. Once I have it set up the way I want it, I can move them inside. I already tested them there and it works fine. Next I installed the tail boom back on, first time I must have had the belt on wrong, the tail blades spun in the wrong direction, so I fixed that. Then I did the easy stuff, like mount the landing gear, the tail boom supports and fly bar paddles. I also installed the 40amp ESC, I was not sure which side I should have face down, if it even matter. You can see how I installed in the pics. Also notice I have new bullet connectors, I have two of the new blue cell pack, which will mate right to it. And when I ordered Andy sent me (2) connectors for charging (no soldering needed) Now I just need to install the servo arms, get my swash level, etc. I will just copy over my settings for the Blue Ray (DX6i) and tweak them, oh, and of course program the ESC. Then I will install my gyro and I should be done.  I have some things I am doing with my girls today, so the rest will have to wait a few more days, but I am close now. Looking forward to spinning her up for the first time.     |
|
akent
Moderator    FIRST 30 MEMBER
I love the 500!
Posts: 2,826
|
Post by akent on Jan 31, 2010 12:05:41 GMT -6
Looking good, Flyinghigh!!
It doesn't matter which way the ESC is mounted.
When I install or replace the servos in mine, I loosen all of the screws on one side, remove the head, the top main shaft bearing and the cross supports. Then I can easily get them in and out. It only takes a few minutes once you've done it a few times!
I'll be interested to hear how well those Exi servos work.
You probably already know, but you should check ALL of the screws, even in the head and tail for loctite. I had link balls on the head that came loose, a spindle shaft bolt back out, and a tail screw come off. None of these were loctited.
The best part about building your own heli is that you will know how to fix it MUCH easier!
You are getting close! I think you will love that bird! Mine flies very smoothly.
Kent
|
|
|
|
Post by flyinghigh on Feb 1, 2010 12:46:22 GMT -6
Thanks Kent. This build has been a good lesson for me for sure. It will definitely be easier next time around and/or when doing maintenance and repairs. I will definitely report back on the EXI servos. I still have the stock cyclic servos in my BlueRay and they are fine for my docile sport flying. This all started originally as 'spare part' for my BR, and turned into a build. If I dont like 'em, at least I know how to get those hitech hs65's in there.  Yep, loctite everything. Taking my time on this one, trying to get it all right the first time. Next weekend I should be able to do 'maiden' flight, I will be sure to video - could be interesting.  |
|
|
|
Post by flyinghigh on Feb 22, 2010 15:18:27 GMT -6
**I would have posted this sooner, but lately this board is just painfully slow for me** DAY 3 of build (Feb 6th) Got a few more hours tonite to finish, got the ESC programed. Installed the servo horns, got all my servos moving in the right direction. I got my swash level, set my pitches in idle up. I just copied my pitch curves and throttle curves over from the BlueRay. Everything is nice and level. HITEC HG-5000 GYRO WITH 5083 DIGITAL SERVO Moved to the gyro, tested the servo, and ITS BAD! I bought this gyro combo servo months ago, so I probably stuck with it. I can probably pick up a 5084 at my LHS, not sure if they sell the 5083 by itself with out the combo. The servo only responds to one direction, it does not respond at all in the other direction. I tested with a servo tester and I just plugged it directly into the rudder channel. Move rudder stick to right, it works, move rudder stick to left...nothing ... :cry I have a spare D213F but thats gonna suck compared to the hitec servo -   Also, the tail slider seems 'stiff' I put a dab of 3in1 and its a bit better, but does not seem to slide as easy as my Blue Ray |
|
|
|
Post by flyinghigh on Feb 22, 2010 15:20:26 GMT -6
Feb 12th -
I tried to install the D213F servo on the tail with the HiTec gyro, the movement of the tail linkage seemed very stiff to me. Once I installed the D213F servo, I tested it, it would not even budge the tail rod linkage. I knew it was too tight. So I took of the tail rod linkage and just slid the tail slider with my hand, nice and smooth, no binding. I then took the tail rod linkage, slid it back and forth thru the guides, again nice and smooth. So I attached the tail rod linkage, and again stiff as hell. So I took a closer look at the ball joint and it looks like the plastic linkage is binding on the metal ball itself. When I removed the plastic linkage, I could see a small piece of plastic sticking out inside, probably the injection site on the mold.
So, for the heck of it, I retest the D213F servo, it no longer works. Yikes, did not take much to kill it. So now neither servo I have for the tail works, ...or so I think.
I start making some calls to replace the hitec 5083 servo, and I happen to get on the phone with a tech. I tell him my problem with the servo and he tells me something about the 5083 I TOTALLY over looked. When I was testing it, I was using the servo tester, or the rx itself, and it seemed to only work in one direction. Why, the 5083 uses a specific signal/band for the hitec 5000 gyro, it MUST be hooked up thru the gyro in order to work properly!! DUH!!! So I did that, and it appears my 5083 is not bad after all!!!
However, after messing with the stock tail linkage rod, and seeing several others suggest using a carbon fiber one with no guides, I decided to do just that, and ordered Align Tail Linkage Rod, which I just got a few minutes ago.
So either tonite, or tomorrow am I will try again to complete the gyro/tail servo set up.
|
|
|
|
Post by flyinghigh on Feb 22, 2010 15:22:25 GMT -6
Feb 13th - Build is complete - Installed the carbon fiber tail rod linkage, nice and smooth. Got my HiTec 5000 gyro and HiTec 5083 installed and working properly! Now all I need to do is go over it all, make sure I tightened everything, and drill a hole for the grommets for the canopy - Here are a few pics - windy as hell here today, so will try maiden flight tomorrow.   |
|
|
|
Post by flyinghigh on Feb 22, 2010 15:24:19 GMT -6
Feb 20th -
Well, I did a little test hover today.
1) Tail was very erratic and twitchy, can't see it much in the vid, but made it hard to even hold in place during hover.
2) I need to work on getting the swash level, it looks level but I can tell the way it lifted off and they way it flew in just the short
hover I did.
3) My gear mesh is too lose, you can really hear on spin on and spin down, left marks on the main gear but should be ok.
Not sure whats up with the tail, no mater how I adjusted the gyro, the tail was erratic and twitchy. Check the belt, seems to have the right tension, have to spend some time tomorrow and figure out what wrong.
|
|