|
|
Post by Dave on Jul 2, 2011 12:47:24 GMT -6
Unlike most others this will be a very slow build. As you can see below all I have at this point is the bare bones kit. I will attempt to keep the cost of this build somewhere in the $300 to $350 range. Don't have to have the best but do want dependable items. And as suggested at this time I will keep it all stock parts, no CNC upgrades. Anyways here are some photos as I open up the box. As the seller advertised in un-opened box  Before opening the box I expected it to only to be a box containing all the parts. To my surprise it actually had two layers. The top contained the canopy, manual and decals. 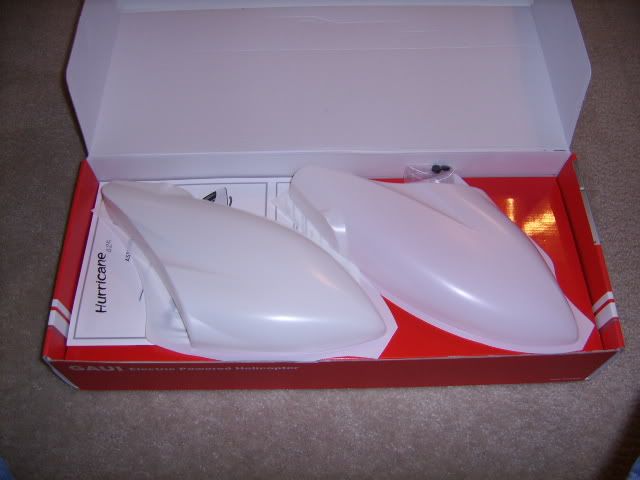 the second contained three large sealed plastic bags with smaller bags inside. 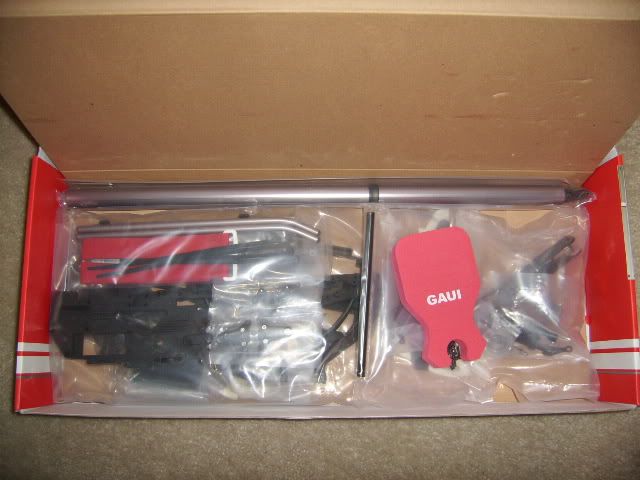 These are the items that were on the top half.  and the lower half items. 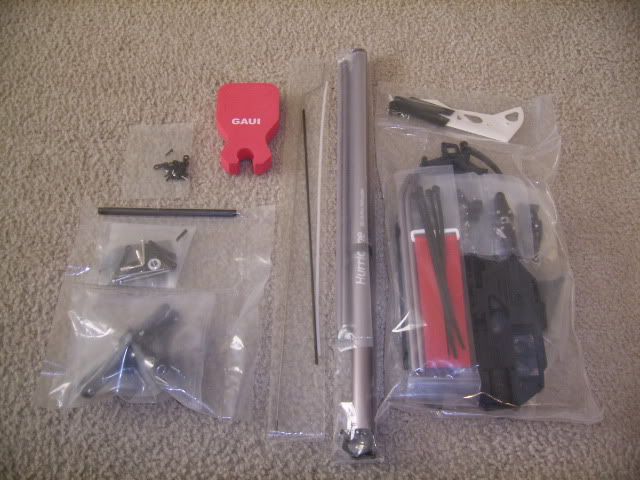 As you can see in the last photo there are several smaller bags inside the large bag. Have to go cook 83 pork butts right now so I will get back to these later and post up a few more photos of what they contain. Also I am going to reserve a few post at this time for future build post. Dave Edit 7/3/11:
Decided not to bore everyone with whats in each bag as you will be seeing whats in the bags as the build progresses. Will just say that GAUI seems to have everything pretty well separated by step. The only suggestion I would have is to mark the bags in some fashion as to what step it is for. Why you say that Dave, because there is a small bag of hardware and I be dang if I have figured out what they are for yet. Extras perhaps  Edit 7/4/11 Edit 7/4/11
When you hear me reference left and right I am looking aft forward. I am in the aviation business and you always look at things as if you were sitting in the pilot seat facing the nose. |
|
|
|
Post by Dave on Jul 2, 2011 12:48:08 GMT -6
OK got to spend a couple of hours this morning before everyone was awake going over the manual for the 425. All in all not to bad of a manual, very little broken english that this old boy couldn't figure out. Scale of one to 5 with 5 being the best, give it a 3 1/2. So thought after a brief break and a couple of early morning honey do's that I would tackle the first page with a dry fit of parts, no thread locker at that time. 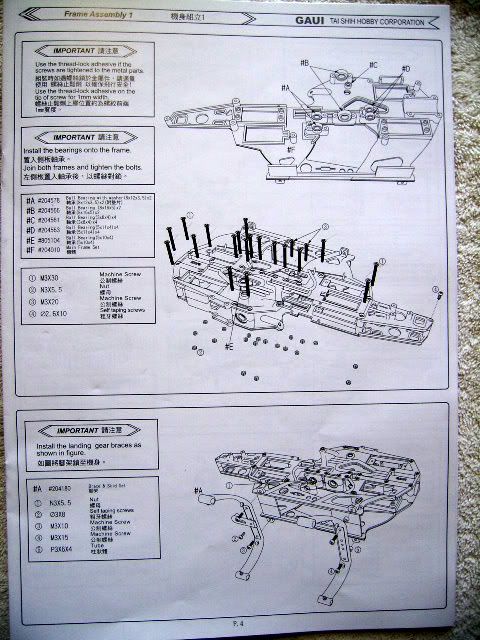 As you can see about all that you are doing on page one is joining the two half's of the body installing 8 bearings and the landing gear. The two half's are very well made and of a very heavy thick plastic and mate up very well.  Bearing Placement The only issue that I had at first was figuring out the correct placement of the left and right set of bearing. Center one's, no problem. Had to do a little re-reading and research to figure it out but it is simple and I hope that if you decide to build the 425 this will help you. How did you figure it out Dave  Like I said I had to do a little re-reading of the manual and while doing this noticed that one set of the bearings had to fit the shaft on the belt pulley aka "Front Pulley Set". As the inside diameter of the two sets were different.........problem solved  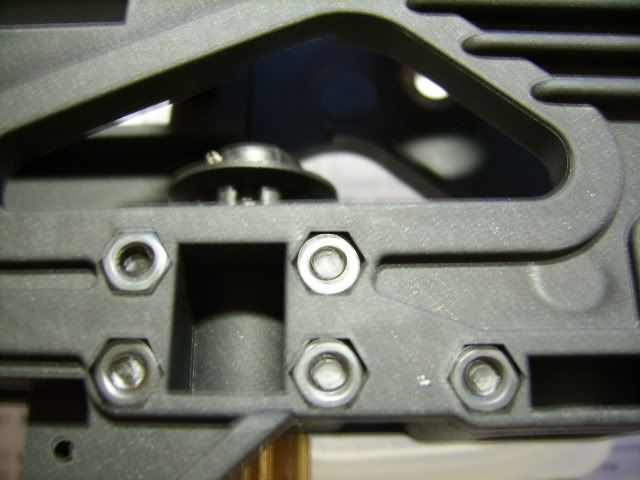 This is the one thing that they get a 5 out of 5 for IMO. Captured nuts. I hate having to use two tools to assemble anything, much less something this size   All in all not a bad first page assembly process. Some 20 screws and nuts later you have the assembled body half's with landing gear braces. Now the bad thing is all of the hardware has to be removed, bearings pulled and greased and everything has to be re-assembled and thread locked and I also suggest using a little adhesive on the outer race of each bearing to hold them in place, being careful not to get any on the inner race or the balls or needles if thats the case. EDIT:One thing I forgot to mention on this part of the build. You do not want to loctite the four screw. If you do you will not be able to instal the tail boom when you get to that part without breaking the loctite loose. If I were you I would save this for one of the very last items to loctite. 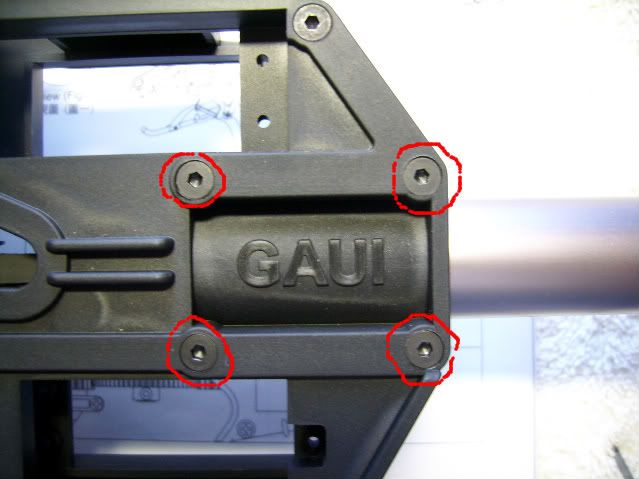 |
|
|
|
Post by Dave on Jul 2, 2011 12:48:25 GMT -6
 Here they have you install the skids in the braces. I have found it much easier to work the assembly without these items installed. Save them for one of the last things as it makes for a much flatter surface to work on. You also install the front main gear assembly, which comes pre-assembled along with the one way bearing, and the pitch, roll and elevator arms. Here are the assembled roll and pitch arms. Make sure when installing to the frame to place on the correct side as it will make a difference when installing the links. 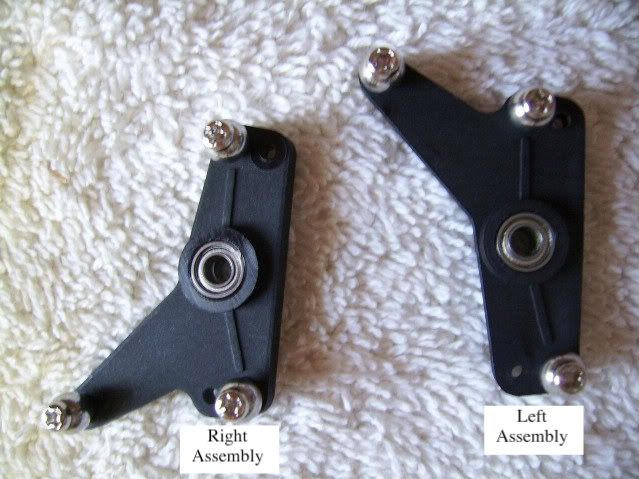 The nice thing about the elevator arm is that it is Ragun proof. It is geared so there is no way to install it backwards. The lever arm (#204514) has a set of male gears which mate up with the elevator arm (#204513) 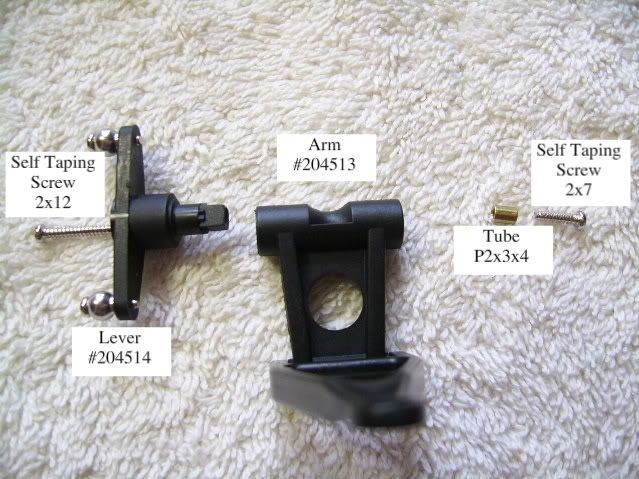 Note the flat surface on the arm. This is why I say that this thing is Raygun proof. No way he could install it wrong  Edit Note: Just in case, Ray this surface faces the left side of the heli Edit Note: Just in case, Ray this surface faces the left side of the heli Break out the grease when you get ready to install tube P2x3x4 to assist in holding in place when installing the arm hardware. 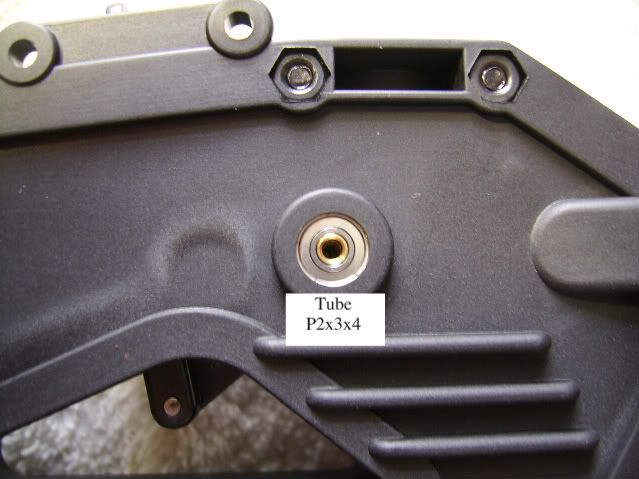 Next was the assembly of the front main gear and the one way bearing. The only issue you may have here is keeping the two small washers (W8x10.5x0.5) and the tube (P8.1x9.6x5.3) in place while installing the shaft. I broke out the grease again to assist.  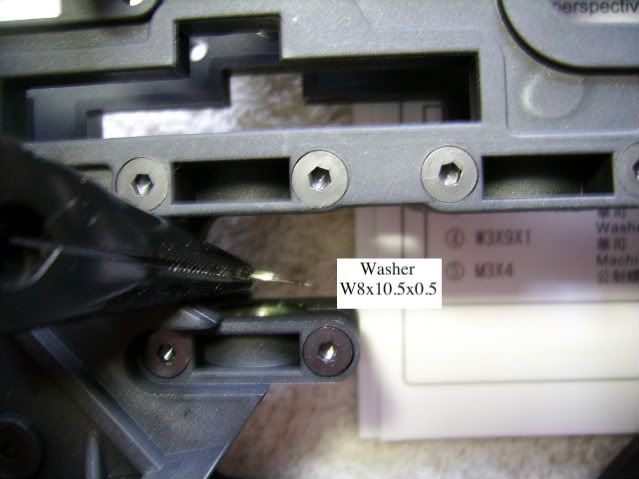 |
|
McKrackin
First 30 Member   First 30 Member
Flippin' the bird!
Posts: 3,720
|
Post by McKrackin on Jul 2, 2011 13:12:58 GMT -6
First thing I'd like to see is putting the canopy together.
Never seen that before.
|
|
akent
Moderator    FIRST 30 MEMBER
I love the 500!
Posts: 2,826
|
Post by akent on Jul 2, 2011 16:02:07 GMT -6
I haven't seen a two piece canopy, either. It looks like ABS, so I would recommend getting a real pair of plastic scissors like they use in the car world. I'm building up an Electric Formula One plank where the canopy and turtle deck are ABS like that. These snips made trimming it a breeze. Then you need about 220 grit sandpaper on a flat surface to get the edges flat. I would recommend not trying to use regular scissors or an exacto. Ask me how I know... I bought mine from the LHS. They are like these: secure.hobbyzone.com/HCAR0667.htmlThat's going to be a fun build, Dave! And that is a perfect size, at lease to me. Kent |
|
|
|
Post by Dave on Jul 3, 2011 16:39:36 GMT -6
First thing I'd like to see is putting the canopy together. Never seen that before. I've never seen one either McKrackin and probably will not use this one at first. This thing is paper thin. If anything I will try to locate a good glass one that is cheap and white so I can paint it as I like. Dave |
|
|
|
Post by Dave on Jul 3, 2011 16:44:06 GMT -6
Hummmm interesting there akent. Me thinks the wife may have something just like that in her sewing stuff.......think she would miss them for a day or two..  Boy if she catches me its your butt akent cause I will tell her you told me about them  Dave |
|
|
|
Post by akphill on Jul 3, 2011 19:45:14 GMT -6
starting to look good  My sport 500 had a 2 peace canopy like yours and it was a, well lets just say challenging good luck |
|
Raygun
Moderator    FIRST 30 MEMBER
The needs of the many out weigh the needs of the few
Posts: 1,567
|
Post by Raygun on Jul 4, 2011 7:54:52 GMT -6
Hummmm interesting there akent. Me thinks the wife may have something just like that in her sewing stuff.......think she would miss them for a day or two..  Boy if she catches me its your butt akent cause I will tell her you told me about them  Dave You never want to give Dave glue or something Sharp.  |
|
|
|
Post by Dave on Jul 10, 2011 7:13:31 GMT -6
Not much to show and tell here but for what its worth here it is. As you can see below about all that you do here is install the motor, which I don't have yet and install the front pulley assembly.  Not quite sure why the front pulley shaft has the two holes as only the top can be used for this assembly. Perhaps there is a mod of some type that I may discover in the future  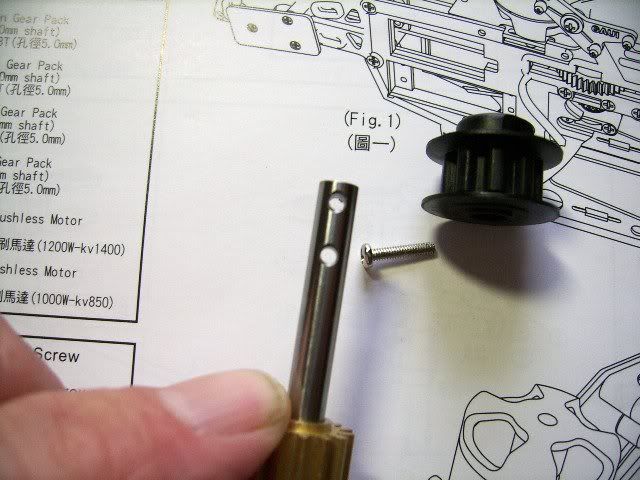 Nice motor mount platform with shaft bearing installed.  [ Next up the rotor head assembly  |
|
|
|
Post by Dave on Jul 11, 2011 16:22:33 GMT -6
Got some time last night to sneek off to the heli room upstairs and work on the 425. The rotor head assy. was next on my list 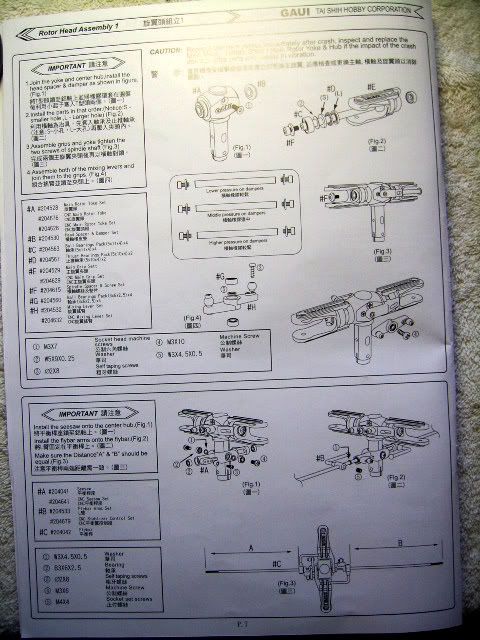 There was not much to do here as 90% was assembled. The biggest item on my list was to make certain that the feathering shaft bolts has been loctited in and to my surprise they were. However I did discover that the seesaw assy. had not been loctited, is that a word oh well works for me, so after removing both screws and applying the loctite they are now.  Next came the flybar installation. Be sure to install the two small washer that are provided prior to installing the flybar arms. Also I suggest not loctiting the set screw at this point as in the flybar arms as adjustment may be needed later. 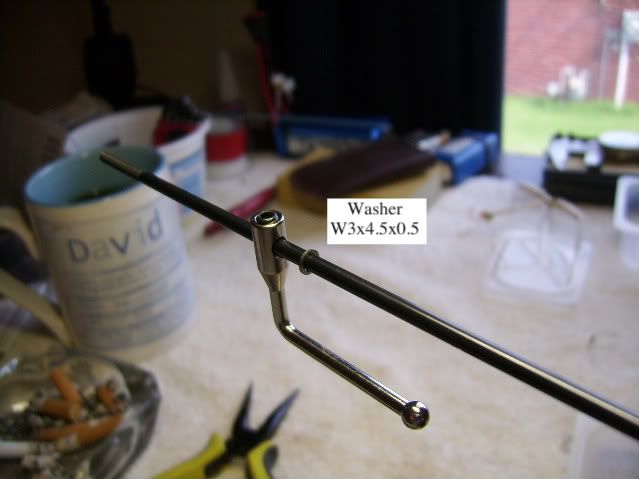 This part of the build is straight forward if you have ever had to rebuild a head. Nothing out of the ordinary. Just make sure to check all screws to metal for loctite. 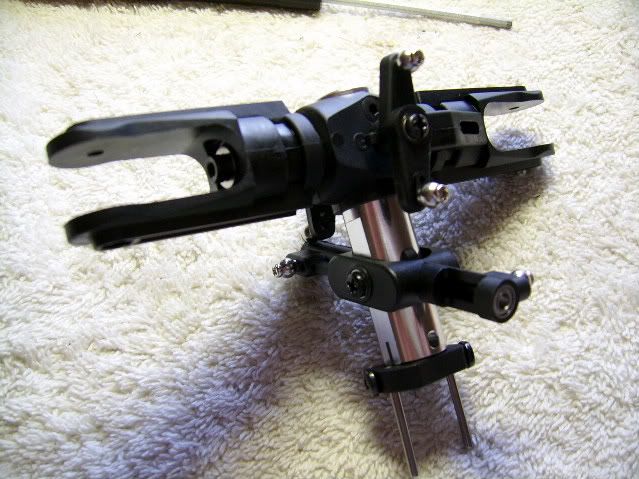 |
|
|
|
Post by Dave on Jul 11, 2011 16:23:02 GMT -6
You are now ready to install and loctite in the following items. Washout guide Main mast/Main shaft The only issue here is to make sure that the mast/shaft is orientated correctly. Note that the holes are at a different distance from the ends. Install wrong and you will have to pull the head and reverse it. Ask me how I know......   Now even though the nut that holds the head to the mast/shaft is set to hold the bolt without loctite I still applied a small amount to the end of the bolt, just for peace of mind. 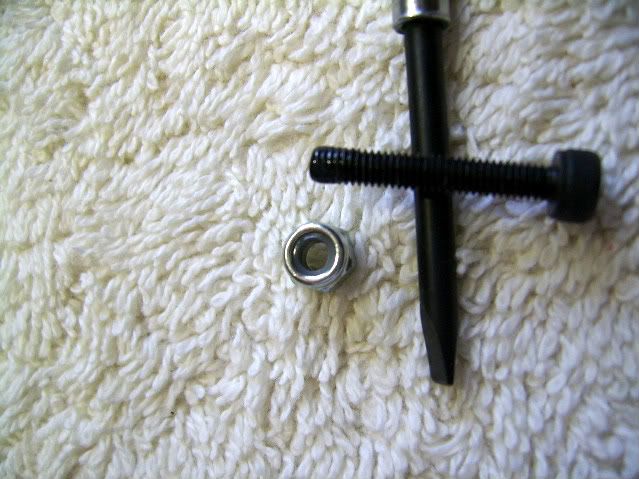 I know this type of nut has a name.  know the correct name. The next item to install was the rear main gear. It is again straight and forward. Align rotor shaft, install gear and loctite. At this point you also start installing some of the links from the head to the swash. These guys are good in that each hard plastic link is marked so you can't install the wrong one in the wrong place.   Next up is the tail. Almost done  |
|
|
|
Post by Solitaire on Jul 11, 2011 19:52:18 GMT -6
Locknut, Dave...or Nylock.
|
|
|
|
Post by Dave on Jul 12, 2011 4:15:29 GMT -6
Locknut, Dave...or Nylock. Nylock yeah that's the word I was looking for, thanks Solitaire. Knew I could count on one of you guys to help the old noodle.  |
|
Doozer
Paint Staff   FIRST 30 MEMBER
Working on GP Ultimate Biplane
Posts: 1,508
|
Post by Doozer on Jul 13, 2011 22:17:24 GMT -6
Looking good davo. You don't have to use that canopy if you're going to keep it a 500. I use an Align 500 canopy (bought a blank one).
But keep the plastic one so if you stretch it you can put a bigger motor in it.
Nice build thread!
|
|