|
|
Post by Gabe on May 16, 2010 16:38:46 GMT -6
OK, here we go! First, here's a little background on the Darkside Stryker Build. I have purchased a custom built motor from Mega that came in at 1360KV. With the proposed 6S battery and prop setup, we are approximating 1900 watts, maybe 1950. Amps are approximated to be about 90-95. Currently, the motor is with good people being tested with different props. I should have some data within a week. This build will mimick MoparMyWay's build from RCUniverse, and I will post pics and try to explain the build as best I can. I've been in contact with Mopar and Gyphon from the Darkside threads and will be doing some additional mods not shown in Mopar's build. Here's what I got done today: First I started with the bare fuse. The stock fiberglass rods are the first thing to go. I will be replacing them with .210" carbon fiber (cf) tubing. I simply used pliers are ripped the stock ones out - carefully of course. If you pull too fast, you get some foam with the rods.  Next, I taped four (4) sawsall blades together with some masking tape. I used these to make the channel for the new cf tubes. I ran them all the way up to the center of the fuse and out the wingtip for maximum stabilization: 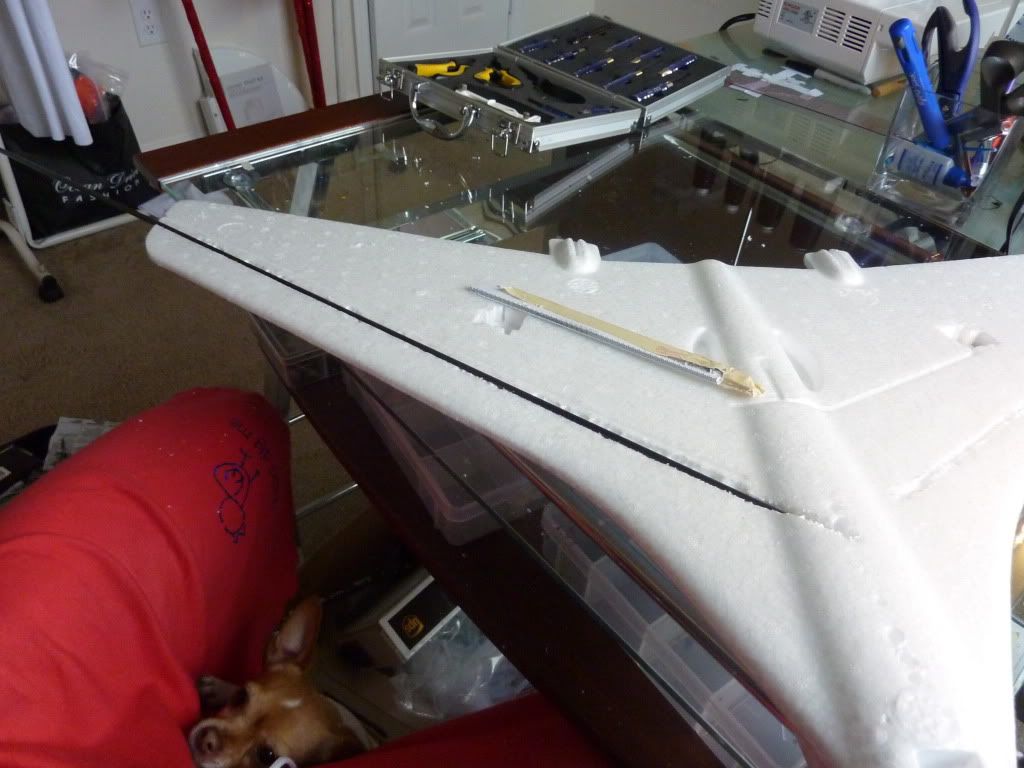 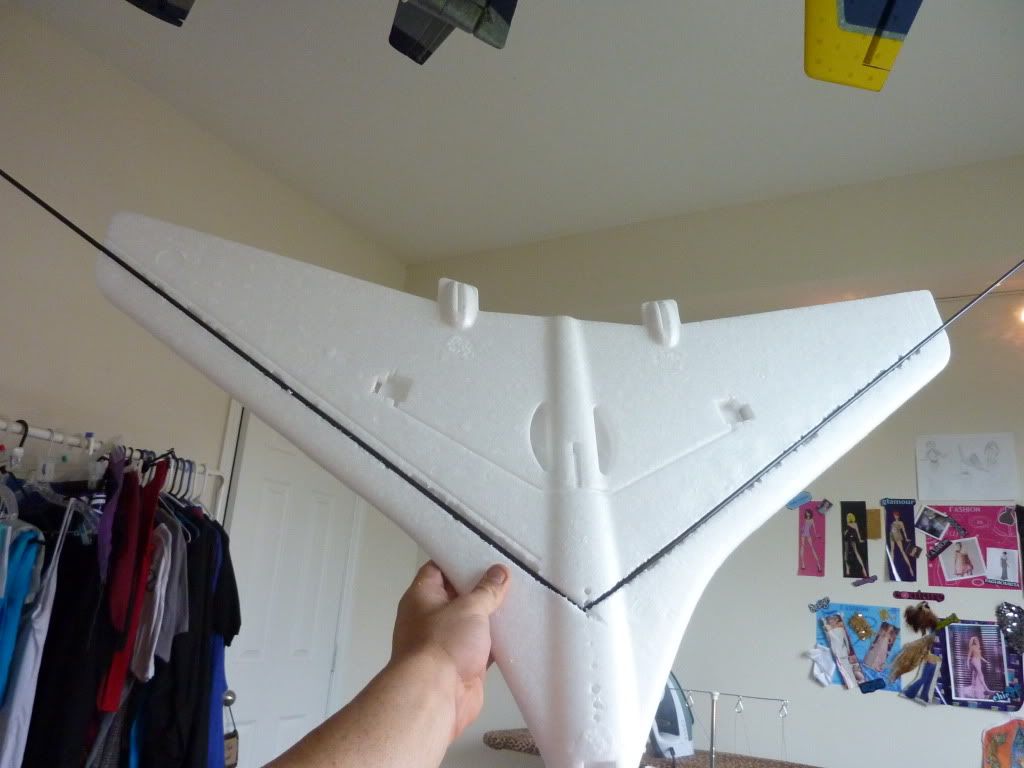 I trial fit both pieces and made sure they were just a smidgen past flush. Next, I used the sawsall blades and trimmed the cf tubing to my desired length. Once I test fit the trimmed pieces an additional time, I pulled them out and laid a bead of hot glue down one of the channels. I quickly pressed one of the tubes into place (its hot and it will sting a little). I had a business card handy to wipe away the extra glue. Then, I ran another bead over the top of the tube (I did this in about 4 increments) and wiped the glue flush with the business card. This filled in any gaps from missing foam, etc. The procedure is the same for both sides:   Next, I used the 28mm custom mount from Gary at www.customrcparts.com, and gently pressed the bottom piece on its future location. After removing the bottom piece from the foam, there will be indents from the mounting locations. I used a sharpie to mark these locations. I need two (2) more CF tubes to complete this portion of the build, and the LHS was out, so I'm gonna have to wait. FYI, the next step is to run three (3) tubes, left to right to prevent wing flex, and then one up the center to the nose. Stay tuned! |
|
19000rpm
Moderator    FIRST 30 MEMBER
Posts: 5,183
|
Post by 19000rpm on May 16, 2010 16:48:27 GMT -6
Looking good Gabe  this is going to be an awesome plane. |
|
|
|
Post by Gabe on May 19, 2010 10:46:54 GMT -6
I'll post some pics of the balsa elevons and the rest of the build log on them today. In the mean time, jut for fun, here's a list of parts I ordered from amainhobbies.com:
1 x Hanger 9 Z-Bender Pliers (HAN119) = $12.99
1 x Team Orion 6mm Gold Plug Set (3 Male/3 Female) (ORI40014) = $8.49
2 x Midwest Carbon Fiber Tube .210 OD x .132 ID x 40" (MID5822) = $13.58
1 x Castle Creations Phoenix ICE LITE 100 Brushless Electronic Speed Control (CSEPHXICEL100) = $118.99
1 x Du-Bro 2-56 Rod w/ Mini-Nylon Kwik-Link 12" (5) (DUB230) = $3.09
2 x Du-Bro 2-56 Safety Lock Kwik Link (2) (DUB815) = $3.78
2 x Du-Bro Heavy Duty Control Horn (.40-.91) (DUB867) = $11.98
2 x Hitec HS-85MG Mighty Micro Metal Gear Ball Bearing Servo (HRC32085S) = $61.98
------------------------------------------------------
Sub-Total: $234.88
Super Saver Shipping - UPS 3 Day Select - Discounted!: $7.00
Total: $241.88
Just in case anyone wants to follow along.
|
|
|
|
Post by Gabe on May 19, 2010 12:20:07 GMT -6
Ok, here's another round of CF installation and the balsa elevons: ----------------------------------------------------------------------------------- So now its time to install the CF tubing from left to right. The build calls for a total of 3 tubes running left to right, but the LHS only had one left. I ordered two more from rcdude.com and they should be here soon. Today, I will show the location of the first CF tube. I set the motor mount from Gary on the bottom of the fuse and marked where the bolt holes would go. Now, I will run on CF tube through the available space closest to the trailing edge. The remaining two will eventually be installed in the next space upwards.  Next, I used a pen to mark the thin side of the bass wood location, basically 3/16" off of the trailing edge. I then used my hobby knife to cut this piece out on both sides. 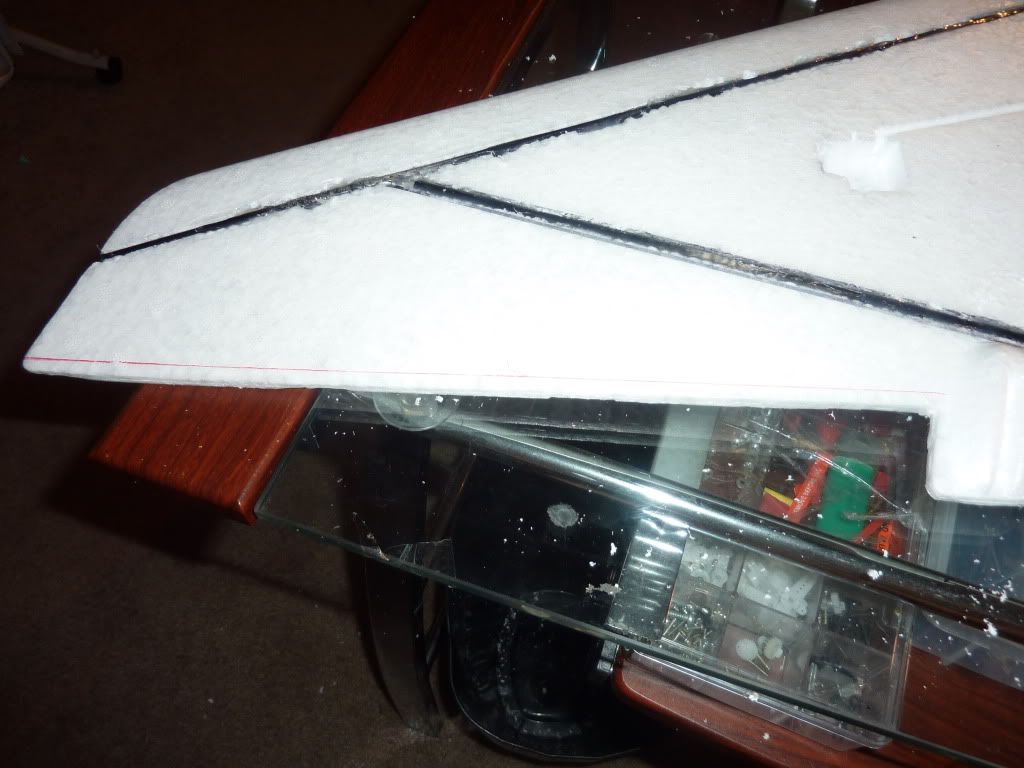 This is the trailing edge after the 3/16" of foam was cut off:  Installation of the basswood was simple. Mopar called for drilling pilot holes in the wood and sticking toothpicks in them. I tried that and since the basswood will get filed down to match the trailing edge, I opened up a couple of those pilot holes while filing. Needless to say, I pulled the basswood off and started fresh, no holes this time. Just make sure the bottom of the BW lines up with the trailing edge. After that, I took my hobby knife and peeled away the layers on top to match the trailing edge. I polished that off with a file job using a 10" bastard file, half round. I used six (6) CA hinges on each side and lined up the aileron the best I could. I then filed like a madman for 20 minutes until everything lined up nicely. I used Mopar's LAR (looks about right) method. As long as the air flows off the trailing edge smoothly, it should be fine. 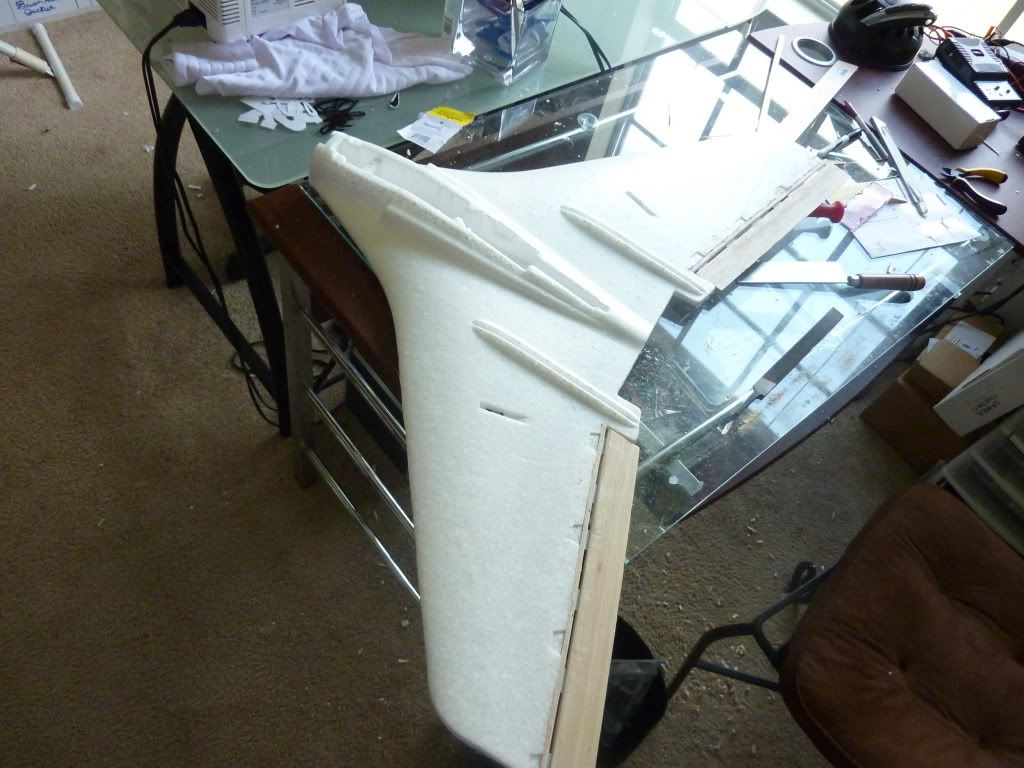 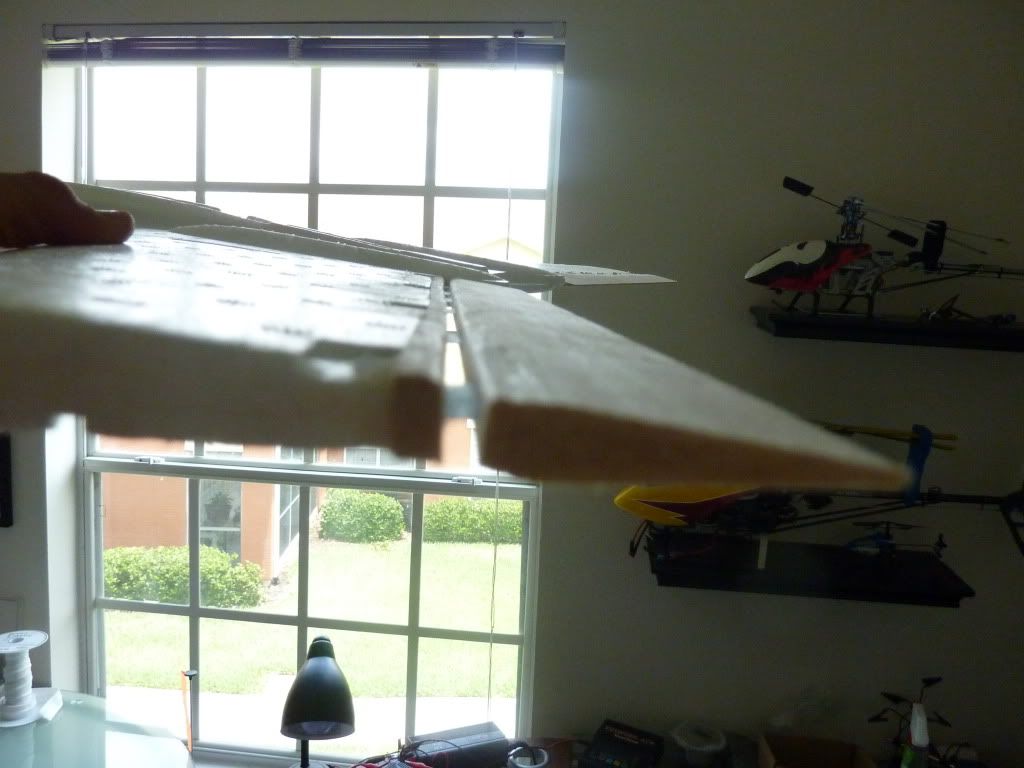   I haven't glued the hinges yet. I have to pick up some slow drying, thin CA glue. The longer it soaks into the hinge and the elevon, the stronger it will be. More to come when more parts arrive! |
|
akent
Moderator    FIRST 30 MEMBER
I love the 500!
Posts: 2,826
|
Post by akent on May 19, 2010 17:58:29 GMT -6
This is GREAT, Gabe!!!!
Thanks for doing it!
Kent
|
|
|
|
Post by Gabe on May 19, 2010 22:01:24 GMT -6
Thanks Kent! Pleasure's all mine.
|
|
19000rpm
Moderator    FIRST 30 MEMBER
Posts: 5,183
|
Post by 19000rpm on May 20, 2010 5:27:54 GMT -6
Great build details. This will make it easier for us.  |
|
|
|
Post by Gabe on Jun 18, 2010 9:42:27 GMT -6
Motor came this week!  Remaining items include 2 Thunder Power Batteries, AR7000 Receiver, and the Co-Pilot CD4. I've also decided to glass the bottom of this bad boy, just to avoid any issues. |
|
19000rpm
Moderator    FIRST 30 MEMBER
Posts: 5,183
|
Post by 19000rpm on Jun 19, 2010 6:51:46 GMT -6
That's some motor Gabe  Why not glass the whole thing? |
|
|
|
Post by Gabe on Jun 19, 2010 9:13:02 GMT -6
It boils down to the weight issue and possibly needing to bungie launch it vs hand launch. My boys on the Stryker Darkside threads suggested using a light coat of epoxy on the bottom only to keep her stiff and light. I think I'm gonna go this route.
|
|
19000rpm
Moderator    FIRST 30 MEMBER
Posts: 5,183
|
Post by 19000rpm on Jun 19, 2010 15:21:55 GMT -6
I can see that. Those guys know what's what when it comes to the stryker.
|
|
akent
Moderator    FIRST 30 MEMBER
I love the 500!
Posts: 2,826
|
Post by akent on Jun 21, 2010 19:22:03 GMT -6
That's AWESOME, Gabe!!
Even though I have a new love in the Funjet, I do now have all the hardware to build up a dark Stryker, except for a motor.
So far, I have basswood for the elevon backing, balsa elevons, hinges, servos, an 80 amp ESC, airframe foam, carbon rods a plenty, and paint cans.
Can you post the specs for that motor and what prop you plan to use?
Hah! I still love the Stryker! I think I need TWO hotrods!
Kent
|
|
akent
Moderator    FIRST 30 MEMBER
I love the 500!
Posts: 2,826
|
Post by akent on Jun 22, 2010 20:20:07 GMT -6
I actually still have an "inrunner" in the 500L heli motor from a Trex 500. It measures 37mm OD and has a 5mm shaft. It's rated at 1600kv.
Similar to some that those folks are running??? It seems that 5 or 6s might be good, but I have no idea for a prop...
3" x 20 pitch?
|
|
|
|
Post by Gabe on Jun 23, 2010 15:50:12 GMT -6
I sent a message to my guy that did all the testing on the motor. I can't remember the specs off hand but it was something like a 1600kV motor, generating 1900 watts. Its a 28mm diameter Mega Motor 16/40.
Prop sizes will be between 7 and 8 inch depending on whether I want crazy verticals or top speeds.
I'll post the specs when the PM comes in.
|
|
akent
Moderator    FIRST 30 MEMBER
I love the 500!
Posts: 2,826
|
Post by akent on Jul 8, 2010 18:27:02 GMT -6
I really have started my dark build! Here is the carbon rods installed. I used the soldering iron method and it didn't work very well in that foam. Oh well, it's in there and the airframe is very strong. Bundled on top is the balsa elevon and basswood backing. Oh, and at the front peak of the two carbon rods, I just shoved them into the foam towards the front. I then pulled them out and poked glue in there. Those really do meet in the front middle. I need to spend more time on this, as I love the way the Stryker flies! Kent Attachments:
|
|